Week 1: Bond Title project introduction
During our first lesson, we were looking at the example and references that Jason gave us to created our un Bond or a general intro. The first exercise was to choose our favorite TV show intro, then analyze then, saying how they made it if the intro was full 3D, part real and film, what software they had used to make it. My choice was The Punisher the Netflix and Marvel TV show for this Superhero/ Villilanty. We have talked about the elements in the intro, saying that the intro was made full CGI where some elements maybe could be may filming some parts, shooting a gun into the water with ink in the water giving the sensation of smoke. This action will make the smoke look floating giving the audience to think that the gun was shot in the air. the guns are all 3D probably was pretty easy to make this intro cause the sequence is all about the same Sniper Gun from different angles and different camera movements.
We also check, some stop motion animation and films, as an example of how we will work in after effects to create our own intro.
Week 2: Small Animation
Rectangular stroke
In the video below we will see the simple animation of a rectangular form, and how we animate, edit the fill the edge and give some life to the figure.


I have started with the simple process of creating a square, changing its attributes, as scale, position, rotation and opacity. The keyframing of its attributes gave me the opportunity to animate this simple form. Colour gain and shape where add later to increase the engaging to the viewer as the shaking and gift feeling.
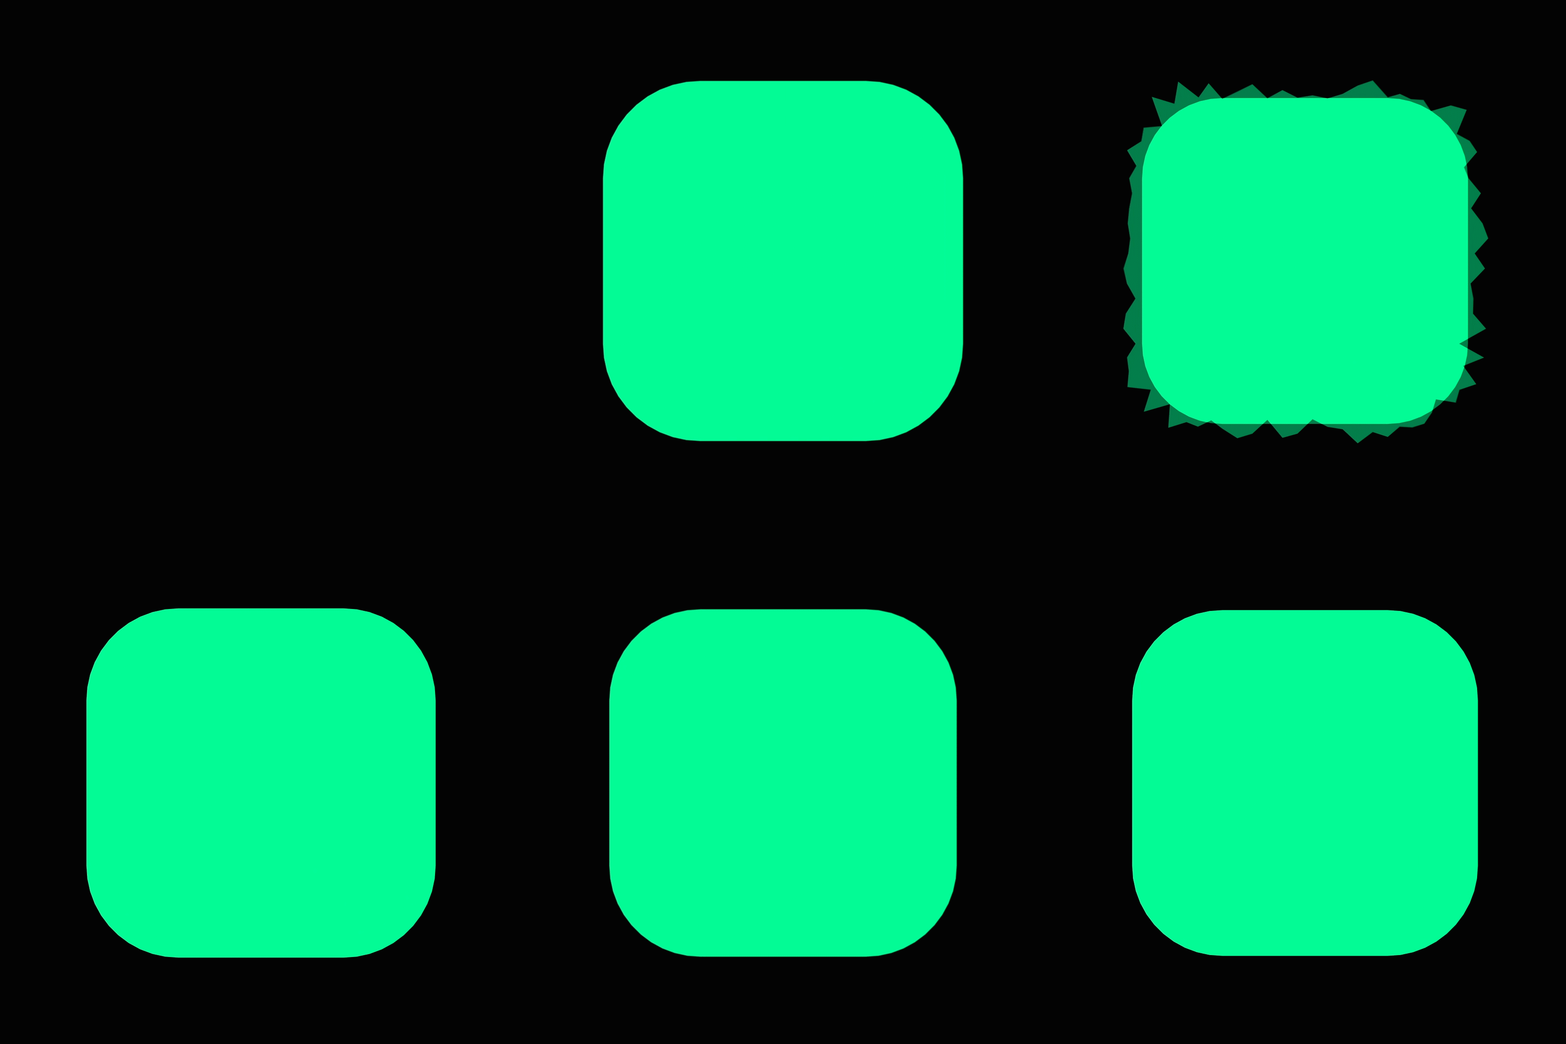
In the image on the right, we can see how I have changed the edges adding shaking, giving to the form the appearance of something that as being electrocuted. This will give the figure charm, which is one of the 12 rules of animation.


The left image shows some of the keyframes and where they are located in the attributes.
Square animation, horizontal colunm

After the creation of the first composition, where I created the square with all its new attributes. I made a second composition where I duplicated the square in 9 then, I gave them the right size in the space. Now they look straight and well distributed. I going to work with them in the timeline, where I gave them life and death. This means when they will start and die.


Last part of the process in the square animation
Final Animation
Week 3: Masks & Alphas


In week 3 we were focused on Alphas & Mask, how to layer on and make the masks work with the different layers, including the use of the masking tools as the masking pen, and the different shapes that you can get from after effects without the use of this pen.
The images above are the ones I have used for my comp. New York, Queens where Spiderman/ Peter Parker is from.
Here you can see the distribution of my layers, also some keyframes that I have animated. The distribution of these keyframes is really important to make the animation look smooth and clean. I have used some predetermined settings for these keys as Keeping the speed at the beginning and at the end, so It will start slow and end slow and smooth.
In addition, during this lesson, we look at the fusion modes where you can play with the alphas and the different fusion mode between your images. This will be reflected during week 4


Here I showing the different masks I have created for this comp, layer them up or down depending on what I want to show to not. The mask also can be animated clinking in the different types of attributes they have, you can see this in the images on the left side.


The animation and the path I have made for the spiderman to fall down and be begging Peter Parkers face.
FINAL COMP
Week 4: Introduction to nuke, keying & Green screen
One of the best software for compositors Nuke, during this week we were looking at the different workflows, viewports, settings and attributes of Nuke. Including the concept of nodal-based software contrary to After effects that are based on layers.


Different colour modes and different settings can be applied in the main viewport as the frame that will be secure to work or the one that will be limited and show the real view of your project at the end.


In the project setting viewport, you will be able to change the ratio of frames per second, the resolution of your project.
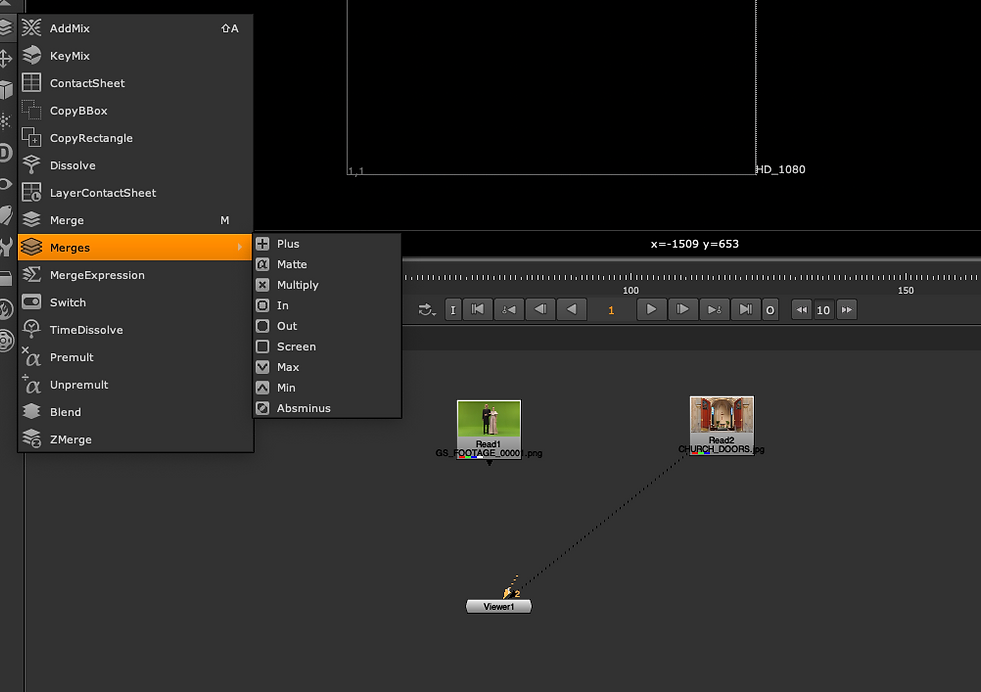


Here we can see how I have selected the key light effect then will appear the key light with some arrows,( background, Out, InM, and source


the images to the left side show the bottom to go backwards or forwards, independently of the main composition. Then we have the bottom to select the color for the green screen or better to say to keying.
Then in the second window where we can see the source selected is we can redirect our key light, or see the final result. This option will be visible in viewer 1
In this last section, we have the NODE Grah with the different elements, and in the right the fusion modes overlap some of the elements, the most typical is Screen


The image above shows the screen gain and a final result of our green screen keylight effect.
The right image shows, that I have scaled the humans to look better in the composition using a Transform fill


With control, we can organise better our Nodes. Yellows points will appear(elbows) to clean or Nodegraph view.


Here we can see the process of exporting our final composition, and how is locking our Node graph view, clean and organise.
Also, we can see the entire process and workflow for Nuke and After effects in the videos below.
Workflow in Nuke
Workflow in After effects
Final Comp
Week 5: Nuke Compositing 3D Renders
Week 5 was about basic composition in Nuke with 3D Renders. Taking the animation from Maya that Jason gave us to Nuke, with mange to export the obj & EXR and the animation to see its different parts and maps. AO, Z, COAT, DIFFUSE, SPECULAR, SSS, TRANSMISON, to modify them in NUKE.


In the image above we can see the Final Render, and the resolution size. Really important in the Export settings section to enable Motion Blur and if you want to edit the main setting for the Camera, Diffuse, Specular, Transmission and SSS. Also that we need to add a AOV custom to add a AO Channel.


Now in Nuke, we need to add different shuffles nodes and rename them with the name of the attribute we wanna add to it. After this, we will go to the input layer and add the EXR(MAps) we have exported from Maya.
In the images below we can see how is working and how they are distributed on the NODE GRaps viewer.


Now is looking a bit confusing but is not, in the image above we see that I have connected all the shuffles to one merge, this won't work, what we need to do now is created one for each attribute then, we will able to edit all of then independency. As we can see in the image below all of them are connected to viewer1, and we will see the same composition as the Read 1 just clicking on the arrow 1 or 2 to see if is any different.


Now we can edit our nodes, individually. In the images below, I have played with the focal depth, giving me the option to relocated the focal point in our composition and a colour correction to play with the colours of our scene, in the SSS node.


I use a grade node for the Depth channel. Set black point to 32 and white point to 115, as the numbers are the distance of the camera from the nearest and the most distant of our 3D model.


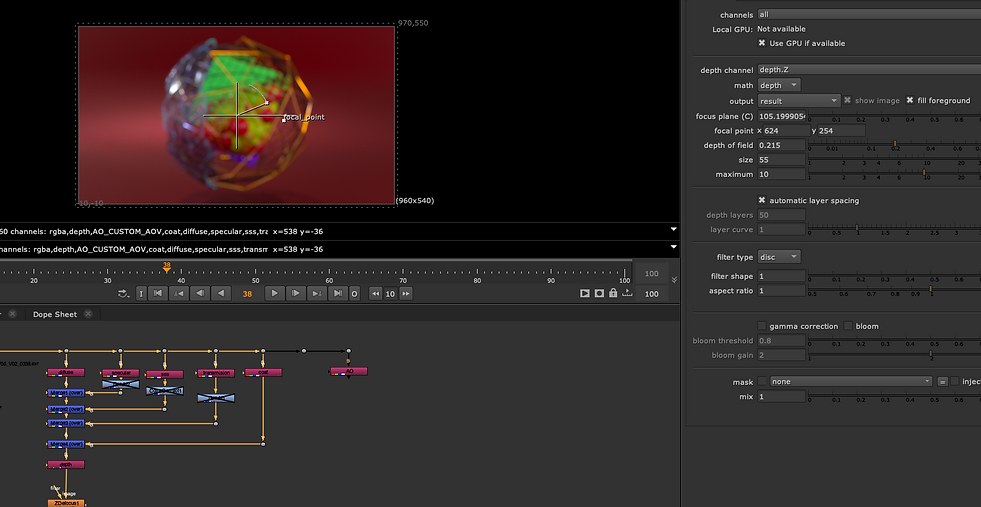

Setting the shuffle node for the ZDefocus node also the math to depth, and setting the output to the focal plane setup we can play with the focal point in the viewport
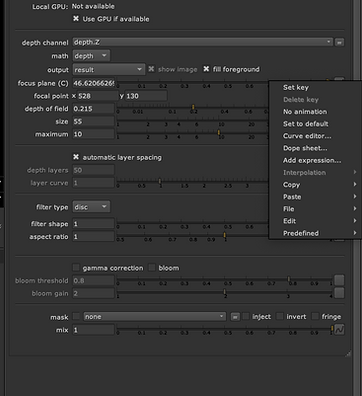


I added a constant node connected to the grayscale mas made by the depth Channel and grade to the merge node. Cause we need some blur between the background and the figure.
After Effects Workflow
Description workflow:
Same composition, that in NUKE but in After Effects.
To begin with the project we need to set the right working space the suit our 3D assets. Then we duplicated the layer with our main composition and apply an effect to each one, this effect is the Extractor, in my case I haven't take any screenshot of this cause my after effects still in Spanish. Now we have to assign each one the passes we need for our composition, as we can see in the images below each one of them is named by the EXR maps we need. Following the last steps and given to them this specific order: Diffuse, Specular, SSS, Transmission, Coat, AO, Depth. Using the ADD fusion mode to all of them except For the AO. In addition, we will need to add an adjustment layer to fix the exposure, cause the gamma exposure has been stripped off from the asset, needs to be corrected at this stage. This correction will be made with the Exposure effect. Then we will jump to the Transmission Layer and add HUE/ SATURATION to colour grade the pass. This followed by changing the fusion mode to Multiplay in the AO Layer.

Now is the turn for the Black Point and the White Pint of Extractor. We will add an adjustment layer, named blur, to blur the far away parts in the 3D parts in the scene,. The camera Lens blur effect onto the Adjustment layer. In the camera lends effect go to blur map, then set to depth, and last we need to pre-comp the depth layer. now we can use the depth layer as a mask for our Blur.

For the AO LAyer, we need to duplicate the name as fog the idea is to change the background a introduce some fog. Now we need to go into the fog layer and change from AO to Z in the extractor effect, We need to make this layer a mask. Now we create a new solid, change the color of the solid with the HUE SATURATION effect, move down the solid below the Fog layer and set the track Matte to Luna matte.

Final Render
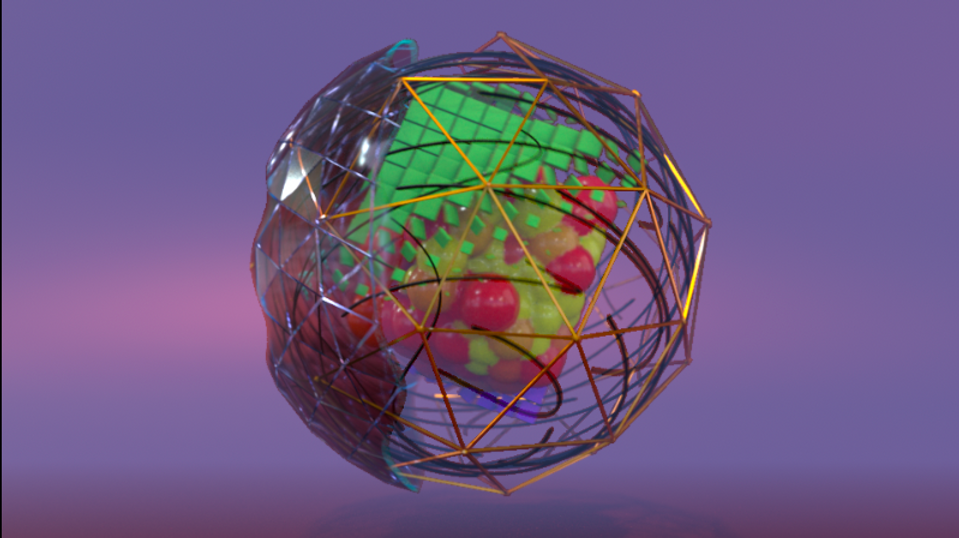
Video final Render
Week 6: Introduction to Animation in Maya
Week 6, was super fun, we were looking at Maya basic animation. Our task was to animated a ball across a labyrinth, in our way we were, manipulating the different tools to create a perfect animation. First, we need to change the workspace into animation, there we will see the timeline viewer, this will be our main tool to edited our animations in Maya. Le's start with key framing our objects or anything that we had made in our scene. clicking on the second mouse we can see the key frame word. Also at the end of our timeline we have a group of tool one of them well have arrows making a circle with a plus, if we click on it, will be on which means that will turn in red and everything we move in the scene will be keyframing.
First we need to set up our frame rate to 25, this will be the standard frame rate for movies. In the playback option in preferences animation, wi will find the frame rate, change it to 25.


Here we can see the animation a the arrows how they will influence the animation, if we move one of them anywhere they will create a key frame. We know this cause the rotation, scale and translate are RED wich mean that is a keyframe created in that spot.
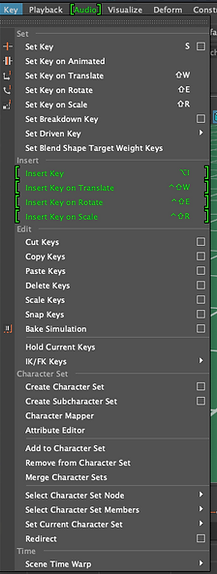
Using tangents we can play with the curves of our animation to make them look smoother, a the beginning of the animation or a the end, this will work basically like a roller coaster.
You can play also with the tangents, between weighted tangents and non-weighted tangents.
Use Stats in the Graph editor toolbar to change the time and the value of each tangent.


Stats also can be used in the graph editor toolbar to change the time and the value of each tangent.
As we can see in the image below curves post infinity options are useful especially if we wanna make a cycle with the offset option. This is to repeat the animation. You can check the infinity under the view menu.


The visualization window has some interesting tools for our animations as the animation snapshot.
This is the playblast settings menu to see the render of our animation or just frames of it following the real animation


TASK THE BALL ANIMATION THROUGH THE LABYRINTH


Workflow ball animation
Ball animation
Camera Animation
Using the curve tool I have created a path for my camera. I linked the camera to this path, with the same frame ratios, so the camera will follow the path that is pointing to the ball. The camera also will need to be animated, later on, I still working on it.


Ball animation + Camera animation
WEEK 8: MASH & 007 ANIMATION
In week 8, we were looking at MASH, a really useful plugin in Maya. Lets start clicking on the Mash editor to open the window and the attributes window. First of all we will need to create a figure, in this case, I will be a square. Now that we have the figure we can click in the MASH and will be connected to the square (MESH). The next window will be the different types of MAShs, you will see then in the second image. One of the Windows that will be always as Standar window is the Dristribution, where we will change some of the attributes of our MASH. The distribution can be see in the third image.

Distribution Window
Here, we can change some of the basic settings of our MASH as, Number of points, increasing the numbers of figures in the same MASH. The Distrbution type, could be Square, Radial, Spherical. Last part the Strength will affect the effect on the main MASH. This can be seen later with other MASHs.


Angle, offset, and number of points.

Normal distribution Radial.

Example of Spherical distributioin

Here yo can see how we have change the distribution of our MASh to spherical, then we have increase the number of squares to 27 ( number of points ).
To created the ball inside of our spherical ramdon ball, we need to create first a new mesh, sphere in this case will suit us perfectly. Then we middle mouse on the Outliner the sphere to the Imput Mesh space, will turn up yellow, if works.


Now the figure will work as one, anyway you can still edit the distribution MASH, as you can see in the left picture, I just make the small square be farther off from the sphera. Also we need the Brandon vertex type in the Method section
In this last pictures we change the method to voxel then we change our square shape to make it thinner, we need to do this from the attributes section, the square mesh atributtes.


Workflow of Mash distribution and spherical mesh with vertex

Workflow with Grid distribution to make a block of squares.
WORKFLOW, AUDIO MASH
MASH Audio is quite useful to follow your music in this case I have use a song from Daft Punk, in this attribute window you can change many things, in X, y, z Rotaton and Scale. Also you can change the mode. The space where says file name will be located or music file, importing the file to Maya and then middle mouse from the outliner to the empty space.

Here we have open the new sub window inside of Frequency Graph, where you would be allow to modificate how your figure is gonna follow the music and how they will be affected by the music. You can also smooth the frequency.

In the Strength section will be applying again how our figure will be affected by the MASH, with the different bars. As we can see in the image above the is getting a bit crazy.

in this last image, for the audio Mash, I gonna show the Mash editor open where you can turn off and on the different MSAHs, also how to take out and turn off the music from your mash. Second bottom on your mouse then Audio then sounds, then OFF.
RANDOM MASH, WORKFLOW
RANDOM MASH + FALLOUT OBJECT, WORKFLOW
SIGNAL MASH + COLOR MASH, WORKFLOW
RANDOM MASH + ANIMATION, WORKFLOW
ID MASH + colorSet, WORKFLOW
007 WORKFLOW
007 FINAL
RENDER 1 WITHOUT FOG

RENDER 2 WITHOUT FOG

RENDER 3 WITH FOG

WEEK 9: MORE MASH DYNAMIC SIMULATIONS & PLEXUS MAN
Week 9 continuing with Mash one of the most interesting tools during this semester in VFX toolbox. We start the class by creating a round curve that later will link it to the Mash, in the distribution mash we chose linear, then we click on the curve Mash and we link the curve to the Mash Curve, now we will see that our mash is following the curve.


As already know, if we want to put some colour to our mash and make it visible in our Arnold we will need to show Arnold the path to the colour. creating the aistandartdatacolor output, and in the attribute write the colorSet.

MASH workflow for Curve, Color, Random, & signal
Final animation for the MASH, curve, color, random & signal
MASH, SIGNAL & TRIALS


Here in this window, you can add caps at the front or end of your trials.

Here you can edit your own curves given them more speed or smoothness, also the end of the cup how thin is.
We can also add some lambert material to our trials to give it some colour.

MASH, DYNAMICS, COLOR, RANDOM, ID, TRANSFORM


WORKFLOW DYNAMICS
WEEK 10: LIGHTS CAMERAS RENDERING
Week 10 was about different types of lights renders, cameras, and how to create an earth globe from scratch, using 4K images from the Nasa website. In addition, we got a small introduction of sound in After Effects.
The camera section was all about different perspectives on how to animate the cameras using the curve tool and also add the curve tool to animate the globe including the camera and the lights.

So here we are in our simple scenario where we have the mesh in the centre of the scene and our new camera. right now we do not have any lights. We got to windows, one is showing the camera perspective and the next window is showing the normal perspective view.

If we going to view, then camera tools we can find so many different options to work with, but right now what is important is the camera attribute editor where we can change all the setting in our camera for our scene, angle of view, focal length, camera scale.

We are looking here at the display option in our camera attributes looking for the overscan, cause what overscan does is showing us a 2D render an image, in the 3D space.

Volume light
Area light


Point light
Directional lights
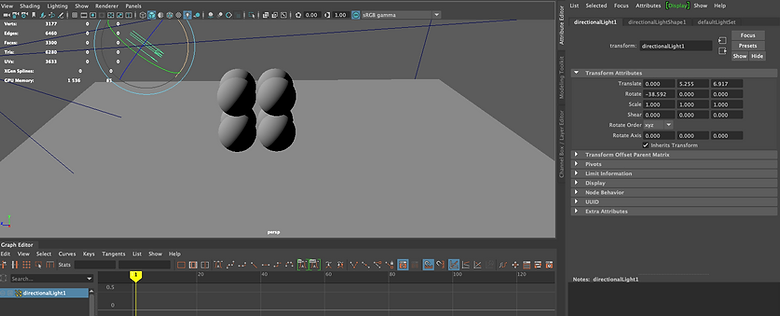


Here we can see how we can change the attributes of the lights in this case is the Directional light, but these changes can be applied to any other type of light named before. AS we can see in the images you can modify the colour of the light and the intensity, these attributes also include the colour of the shadow.
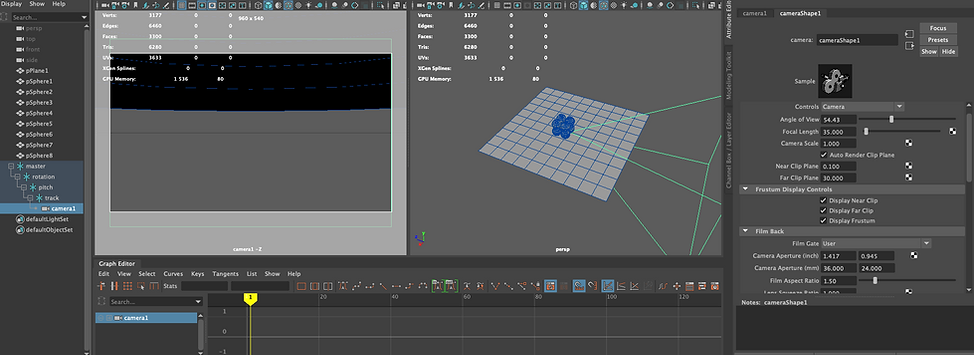

To see through your camera, you need to go through panels, look through, with your camera select.
Also, you can go to perspective the select the option you want, in this case, will be the camera.


In these two, you can see the Bookmarks,
WORKFLOW WITH LIGHTS AND LOOKING THROUGH THE CAMERA
Screenshots to Set-ups for The Earth globe to Render


Globe Mesh, Workflow
Globe Earth, Lights and Camera Set-ups workflow
WEEK 11: SOUND & AFTER EFFECTS
Sound in After Effects Workflow

We can import sound After effects, and apply them to our compositions, I wouldn't use After effect to edit the music or any other sound.
Here we can parent the sound to other resources and make them follow the music.

We also have some Sound effects.

WEEK 12: 3D IN AFTER EFFECTS
During week 13 we have started looking at the 3D in after effects with some text, cameras and lights set up for the composition. also applying different types of mask and layers.


Looking through this workflow. First, we have created our text, then we have to click on the small square to make our text 3d, the same process for everything we used for our composition. the plane where later the shadows will be reflected will also apply to the floor an effect and a mask to give it some texture. We keep the normal attributes for the camera, and light will be a pointing light to the text.
Later we will change the colour of our background to black to make it more interesting.
After importing the planet earth globe as a sequence, and moved behind our text, we will animate our text.
We have made the keyframes manually to give the impression of jumping and some motion blur


AFTER EFFECTS WORKFLOW FOR 3D TEXT+ PLANET EARTH
Final 3D Render 3D Text + Planet earth
TUNNEL WORKFLOW
Including in this week, some extra work, the tunnel that we have created in Maya, with the curve tool, extrude, applying shader surface as a material, also inverting the polygons face to pointing inside.
TUNNEL FIXING, INVERT THE FACES TO INSIDE & WORKFLOW
TUNNEL SURFACESHADER & ANIMATION & CAMERA CORECTIONS
TUNNEL COLOR GRID INSIDE A COLOR GRID WORKFLOW
WEEK 13: MOCAP MAYA & RENDER IN AFTER EFFECTS
Week 13 was awesome we were looking and some mocap, using some preset from Autodesk, and adding the mocap to the character that Maya gives you. Then we created some lights to made the scene look more realistic. We export the final scene with Maya Hardware 2.0 as a sequence to use the scene in After effects.
WORKFLOW
CONTENT BROWSER LOCATION


These two images show something that is not mentioned in the videos, first in the content browser the location of the mocap skeleton movements, second the animation editor where you can apply the movements of the mocaps to the character.

SKELETON UNDER THE CHARACTER
CHARACTER WITH TEXTURE AND SKELETON
BACKFLIP ANIMATION
JUMPING FORWARD ANIMATION
GOBLIN SMASHING ANIMATION
DANCER GIRL MAYA
FINAL DANCER GIRL + LIGHTS + CAMERA MAYA


FINAL RENDER DANCER
WEEK 14&15: AFTER EFFECTS & PREMIER PRO, SOUND, COLOR GRADING AND PERSONAL DEVELOPMENT
ASSIGNMENT 2
A PROJECT THAT MIX VFX TOOLBOX & VISUAL NARRATIVES
My idea began at the beginning of the semester, with the idea of mixing these two modules, creating something new, or guessing something new for me. THE HAND, that's is how I called my short movie. for this project I have used a lot of new techniques that I haven't used before. Like, stop motion with flowers the opportunity to get a green screen and experiment with it was amazing, or creating my own music, I have no idea how to really play any instrument, but I was experimenting and felt awesome. I have watched so many Tutorial, researching, and of course, using everything I have been thought in class.
I will leave here a brief of everything I have used for this incredible project that a least for me it is.


Here we are Dong a really good friend and colleague from the course, helping me with the set-up and the camera. Also, Isabella was there to help me to with the camera later on.
This day I made the shotting for the first animation in stop motion for the intro in The Hand.
I guess next year with the university working 100% for the students will be easier for me to create new things using the equipment from the university cause is really sad we couldn't use anything till now.
During these two hours we were there I was able to use the normal green screen with the light already set up, and a pop up blue a screen that was really useful for the brush of my flowers to keep the greens on it
FLOWERS GREEN SCREEN
FLOWERS BLUE SCREEN
KEY1.2 IN AFTER EFFECTS FINAL OUTCOME
Screenshots following the workflow

In the image to the left, we can see that I have used Lightroom to organic the shots in two different files, one with the green screen and the other one with the blue screen.
Hera I am key framing my mask to hide some areas of the flowers.


In the third image, I am reversing the time to play the animation backwards
Here I have created a adjustment layer with a mask to feather the area I wanna to be less focus


KEYING, MASKING, LIGHTING SOLIDS
RED PLANET INTRO WORKFLOW, LIGHTS 3D TEXT
MATCHING THE BACKGROUND WITH THE FLOWERS
TRYING DIFFERENT SUPERPOSITIONS WITH THE ANIMATION AND OTHER MOVIING IMAGES
AFTER EFFECTS TO PREMIERE TO FIX THE BACKGROUND
MASKING THE GROUND IN PHOTOSHOP
GREEN SCREEN IN PREMIERE PRO & MATCHING THE FRAMES
WORMS KEYING FOR THE INTRO
A DIFFERENT ENDING IN BLAC AND WHITE, WITH THE WORMS
CREATING THE MUSIC FROM 0 TO MATCH THE IMAGES
Other effects I have used for the short movie, camera flares, camera blur, Hue / saturation, Key 1.2, lights, camera, vineta. Then color correction was made with Red giant, colorista VI, I also made research to how properly match the color and the light following always my original idea.


WORMS
THE HAND

