Week 1 - Animation Fundamentals | Bouncing Ball

Move your object, and press "S" to set a key on the time slider.
To set keys
Tip: You can use the Auto Key button to automatically set a key every time you adjust the time on the Time Slider and move the object. See Use Auto Key.
.
-
Select the objects that have the attributes you want to key.
-
Select Key > Set Key or press S.
A key is set based on the Set Key Options. For more information, see Keys.
To set key options
-
Select Key > Set Key > .
The Set Key Options window appears.
-
Set the options.
-
Do one of the following:
-
Click Set Key to add an animation key to your object.
-
Click Apply to add an animation key to your object.
-
This week we start with the simples animation of a ball, investigating different types of bouncing in different kinds of balls. These animations and references will be the solid base for the first assessment. The bouncing ball.


Recording of the process for the bouncing ball.
In the Channel Box you can set a key for a single object attribute,
or for all the keyable attributes.
Set a key for one attribute
-
Select the object.
-
Click the Time Slider frame number where you want to set the key.
-
Click the attribute name to select it.
For example, click Translate X.
-
Type the value of the attribute and press Enter.
For example, enter 10 and press Enter.
-
Do one of the following
-
In the Channel Box, select Channels > Key Selected.
or
-
Right-click the attribute name or text box and select Key Selected.
This sets the key for the object attribute value you specified.
-
Set a key for all attributes
-
Click the Time Slider frame number where you want to set the key.
-
Enter values for the desired attributes in the Channel Box. Press Enter after entering the attributes.
-
Do one of the following
-
In the Channel Box, select Channels > Key All Keyable.
or
-
Right-click the attribute name or text box and select Key All Keyable.
This sets the key for all the object attribute values displayed in the Channel Box.
-
You can key the same attribute value for two or more objects. Select the objects, click the frame, enter the value in the text box, then select Channels > Key Selected.
You can also key multiple attribute values for multiple objects. Follow the instructions in the previous paragraph, only select several attribute text boxes using Ctrl- or Shift-click before typing the numerical entry.
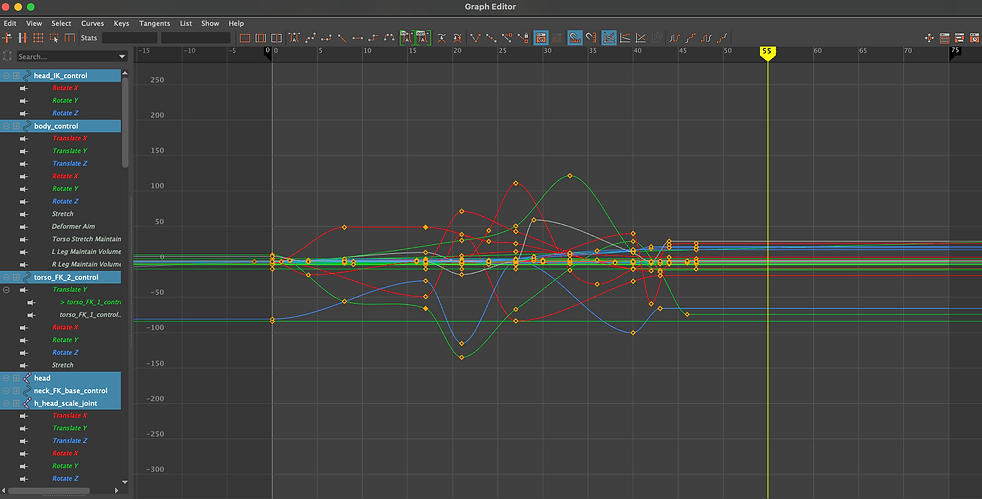
A graphical representation of interpolation between animation keys that you can modify.
To open the Graph Editor:
-
From the main menu bar, select Windows > Animation Editors > Graph Editor.
-
From the view menu bar, select Panels > Panel> Graph Editor.
-
You can switch to the Classic Graph Editor in the Preferences window. See Animation (Settings) Preferences > Graph Editor > Graph Editor and turn on the Classic option.

Dope Sheet & Graphic Editor
&
Set project and Rig Ball
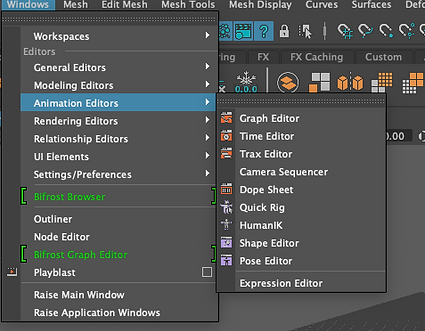
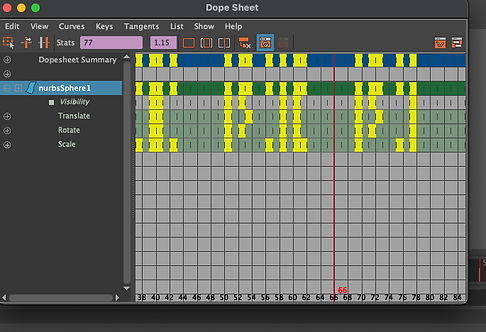

WORKING THROUGH THE GRAPHIC EDITOR


Create an editable motion trail
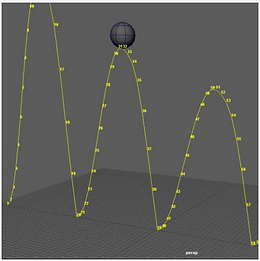
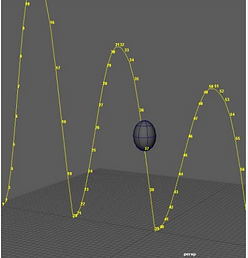

To create an editable motion trail
-
Select the animated object you want to preview.
-
Do one of the following:
-
To create motion trail with default options, select Visualize > Create Editable Motion Trail.
-
To set motion trail options and preferences, such as key size and frame number display, select Visualize > Create Editable Motion Trail > to open the Motion Trail Options window.
-
Assignment_01: bouncing ball.

The idea for the bouncing ball assignment was to create a 2D ball animation, jumping between platforms, this will show different types of animations for the bouncing ball like stretching and squashing. I also have the idea to make the ball look alive, making it look nervous and scared in the first jump take some steps back to jump in the second from the second platform to the third and check how high was the jump to the third platform. The how it speeds up following every step down because of the angle of the platforms. In the end, it celebrates that is done with the path. I have tried to give it also a video game look with that camera perspective. I have taken as reference the video game Littles nightmares that I have played recently on Nintendo switch.
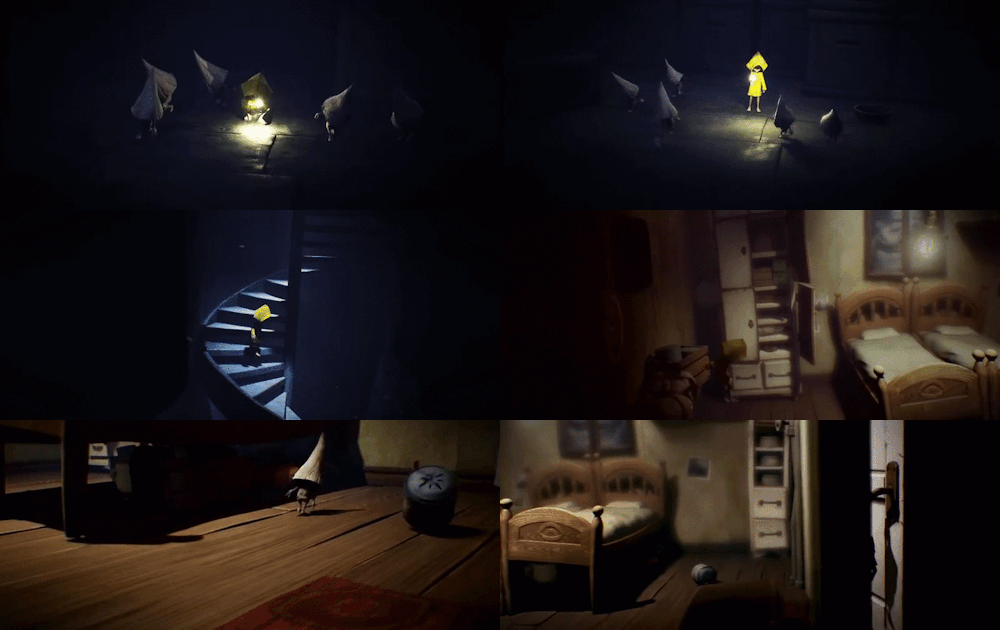
Recording of the assisgnment_01


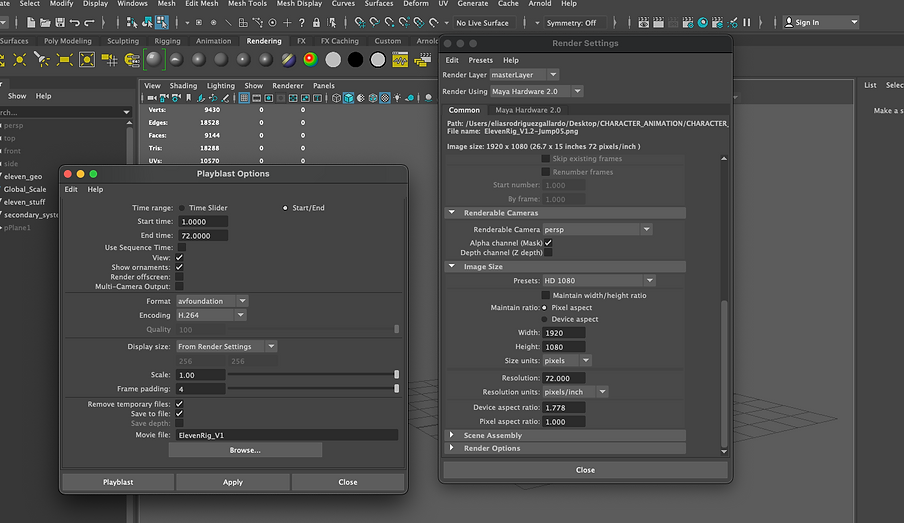
In the images below you can see my render settings and my playblast options. These two were covered in the lessons during weeks 1& 2, to export a simple render from the viewer window inside of Maya. I have also added to my animation some motion blur and solo colours to the shadows, to make the animation more attractive. The resolution of the render is 2K I thought that would look better than the pixels we saw. Using Maya Hardware 2.0 to render the animation. Not to forget that you should change the start of your animation and the end, otherwise it would render the last part you have play in Maya
The last two images below show the process in after effects after importing the animation as an image sequence into after effects, them exporting this again into Adobe Media Encoder to export the final animation into MP4.


Assignment_01:bouncing ball, I think it is alive

Week 2- The obstacle course & control Rig
During week two we will talk about the obstacle course already implement on assessment 1, and the ball control rig, also already used in the first week, in a couple of examples. Looking at the animation interface, how to build the skeleton of our character setting animation controls including NURBS curves. Vendors will apply Rigging as the bases as a bone structure in a 3D model to manipulate later on the character easily.
Puppeteers are used on set to simulate the movement of some character to later capture in front of the camera for the vendors to get the movements and idea of the character in the scene. This technique has been used in His Dark Materials Season 3, where Framestore will be in charge of the character animation.
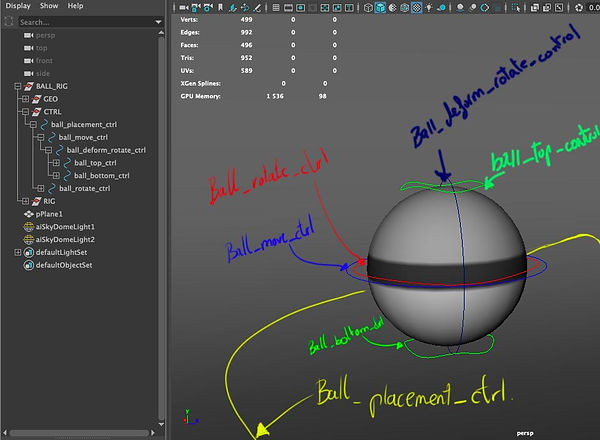
Main Yellow Curved control (ball_placement_ctrl) is used for overall placement and to relocate animation. We will not animate on this but could use it later if we need to re-position.
The Blue ball_move_ctrl will be used to animate the position of the ball.
The Translate channels for the rotate_ctrl are coloured Blue which indicates they are Accepting incoming Translation Constraints for the position. This control should be used for rotation (spin) only.
The Green coloured top and bottom controls named ball_top_ctrl and ball_bottom_ctrl are used for Squash and Stretch on the rig. Use the Translate tool with local translation to deform.
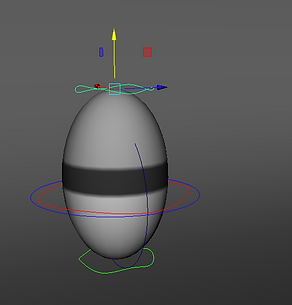
Stretching ball: using the( ball_top_control).

Squashing ball: using the( ball_top_control).
The dark blue coloured ball_deform_rotate_ctrl control allows us to rotate our deform controls to offset our squash and stretch. To use this, rotate ball_deform_rotate_ctrl then set the Translate tool to Object mode then translate either ball_top_ctrl or ball_bottom_ctrl
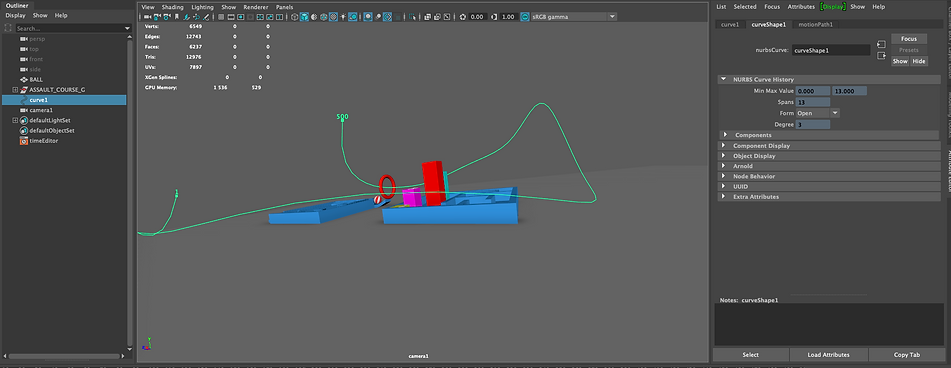
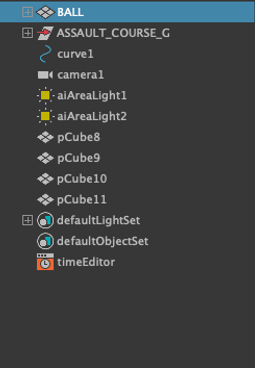
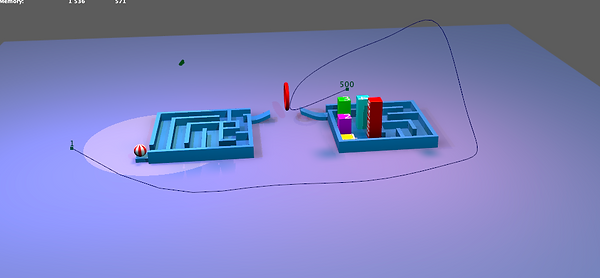
Obstacle course + camera Lights + 3D space.
GRAPHICS EDITOR + KEYFRAMES


LIGHT SETUP
LAMBERT
CURVA PATH + CAMERA+ PARENTING

Week 3: Arm Rig & Flour Sack
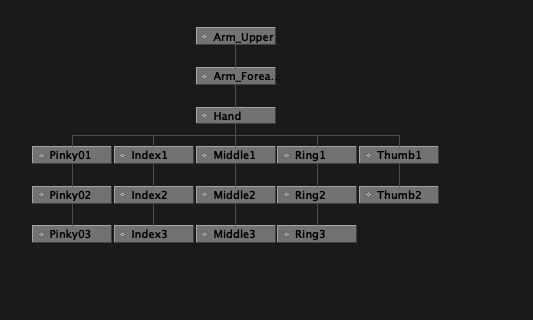
Creating a hierarchy for the motion, I became with he basic hand rig usin poly cubs, this process will be the bases to accomplish a basic rig for an arm. The process is pretty simple, using the parenting tool and right other for the different cubs. Alotugh we need to set up properly the pivot that will be the center of our animated arm.

From the begining of the upper arm until the last cubs(fingers)or(phalanges) we need the to use the parenting tool, following the right hierarchy, also we will need to edit the pivot of each element, to make the center of each piece move from the center of the word space.
Chart of the hierarchy
Here we can see the right other of each element in our scene, linked to the previous piece building all the way up the arm, this process will make at the end of the animation each part follow the parent. That it will be the natural other for a realistic, animated arm.

Go to Modify then go to Search and Replace Names replaces the named string with the string specified in Replace with.
you will found a new window (Search Replace Options).
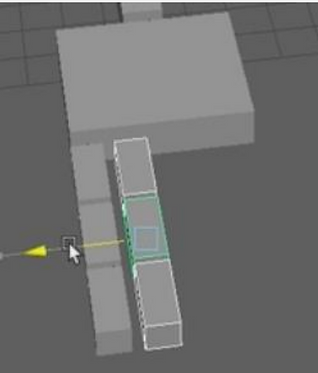

Select the entire arm, go to Modify and click Freeze Transformation. Ths will make the entire group of cubs to keep the actual pivot and follow the next piece on the hierarchy.
Then go to Modify again and Prefex hierarchy names giving a prefix name to every parent and children.
For the next step you will need to mirror the arm, using the duplicate special tool, previously you should replace the L prefix for the left arm with R for the right arm.
Doop Sheet Editor + Hierarchy chart

Arm animation process


Arm animation front view
Arm animation back view
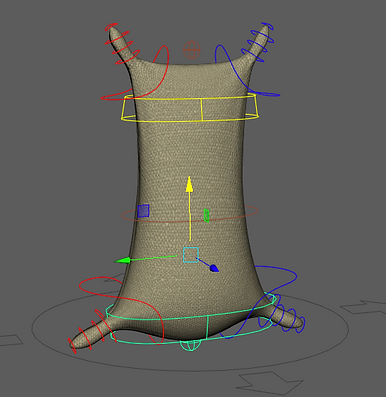
Squash

Stretch
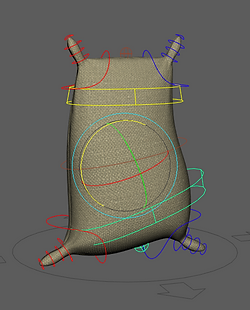

Rotation botton part

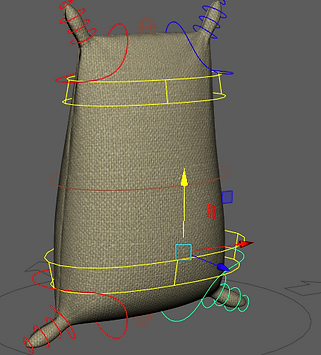
Rotation botton part
Move + Rotation

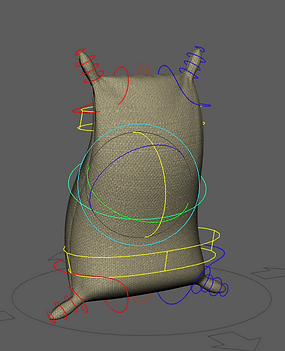
Center section
+ Move + Rotation
FlourSack + Every section moving
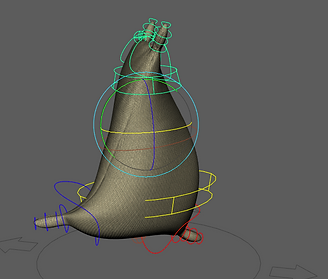
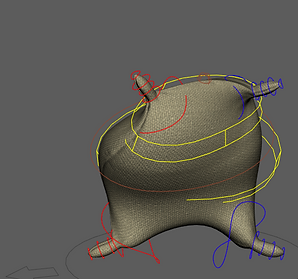

Floursack animation process
Playback Floursack
Week 4: Inverse Kinematics & Animation Output
During this week we were looking at the differences between IK & FK. Basicly the differences between these two type of Rig, is how strongthe link from one parent to their child is, IK will have hadle to control a entire section of chills, when FK will have a more freedom with the handles.
Arm Rig- IK (Inverse Kinematics)
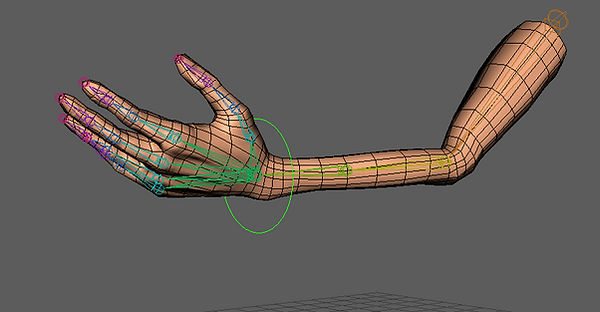
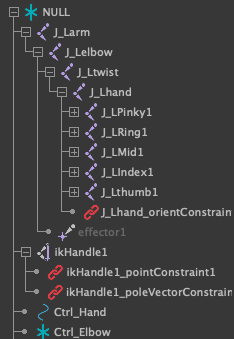
Arm Rig-FK (Forwards Kinematics)
FK+ Animation Process

Animation Graphic
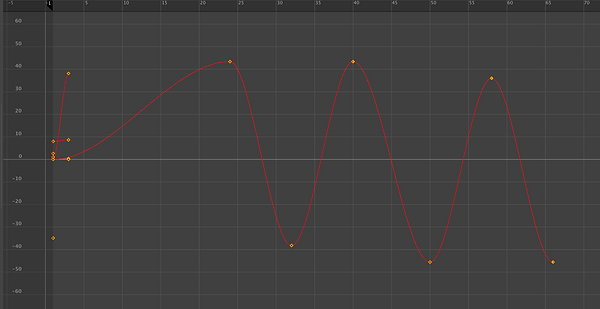
Legs animation + first walking ciclo
Legs animation + first walking ciclo: Process
For starters, we need to set the X-Ray Joints. It will be under the Shading menu of the viewport, this will make it possible to see through the character. Also to in the Hardware Renderer settings enable ambient occlusion in the viewport.
-
Skeleton menu, select Create Joints.
-
Go to cartographic view, or simply change your perspective to a side camera.
-
You can change the join size under Display} Animation} Joint Size.
-
You can use the Mirror Joints Tool to duplicate the joints for the opposite side. (Leg or Arm).
-
To create constraints for parenting hit, Contrains} Parent.
-
The joints for the hips can be connected to the joints in the legs by middle-mouse drag (parenting). Also make a display layer from geometry, when you are working with joints the display layer will make them unselectable. Set the display to R for (References).
-
Make the IK Handles for each part separately. Select Parent then child's joint. Go to Skeleton } create IK Handle. Make more IK handles for the different parents and chills.
-
Enable the stickiness for IK Handles, because they are disabled by default when you create them.
-
Create Different shapes for different parents to control them easily, then parent those to the IK Handles. Remember to the position of the Pivots for the shapes are super important, they should be the well centre.
-
Follow the same instructions to do the upper body section!
Week 5: Posing and Head Turn
During wee 5 we were looking at the dynamic passing using the same right for the week 4, eleven rig. Using different posses with the FK and the IK handles, to recreate real human poses. This exercise was mostly to practice the movement of a full character already rigged.
High kick pose / pose 1
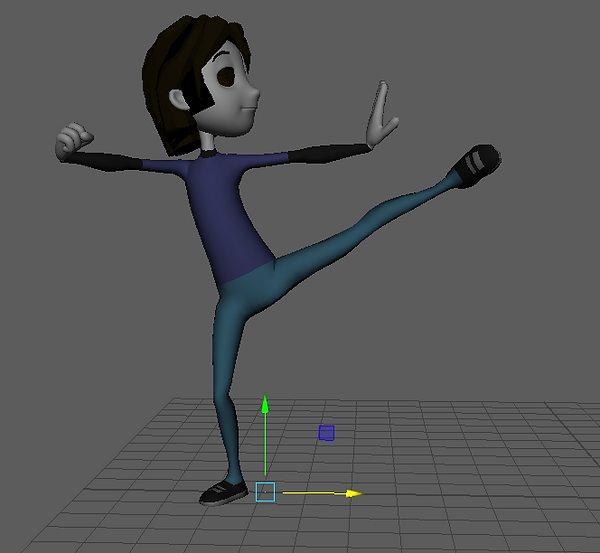


Focusing in a target / pose 2
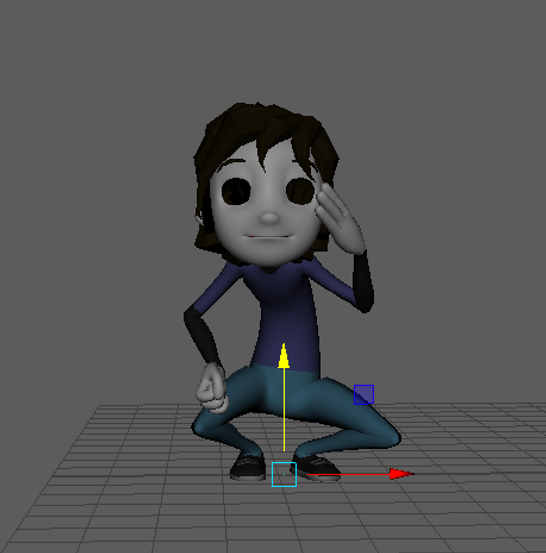


Posing process_01
Turn Head

Turn Head process_02
Week 6: Walk Cycle
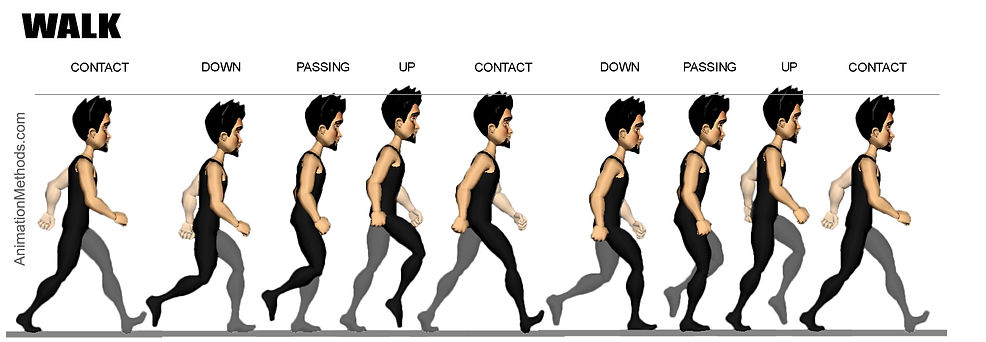
During this week, we had to create a walking cyclo. We saw this already with the floursack. Although this time we need to create something more realistic. Using 2 steps in 1 second= 24 frames. The first step and last step finish in the same pose, then we can loop the walking patent. Also, we will add 4 key poses.
References and step by steps to follow
Animation Layers


Walking cyclo process_01

On the right image, the graphic I made to represent the different frames that you will need to add some changes.
On the left images I took some notes, adding the right values to X, Y, Z for Translated and Rotation on all the frames for the different foot, you will get the same key frames with the same value. This will make the animation look even

Walking cyclo


Other tools you may find useful are:
-
Graphic editor- select and scale keys {change timing}.
-
Time Slider- select and scale keys {change timing}.
-
Graphic editor- retime tool {change timing}.
-
Dope sheet- timing edits {change timing}.
-
Time editor- non-linear editing {change timing}.
-
Contact position, both feet are in contact with the floor. We will need 3x contact poses, Frame 1 left forward, Frame 13 right leg forward, 25 left leg repeat Frame 1.
-
Passing pose one of the foot is on the air, frame and 19 will be passing pose. These are called breakdown keys.
-
4, 10, 16, 22. Will be the up and down poses.
-
Hips position: In the contact position. Hips are rotated towards the leg that is going forward. Arms are opposite following the natural movement of the shoulders. The upper body gets arms into position, rotating opposite to the hips.
-
Walking is the natural process of falling and catching ourselves. We tend to rotate slightly forward from the hips up.
-
The weight of our body is really counterbalancing over top of the foot, that's still flat on the ground its the extreme shifting weight side to side this allows us in real life to keep from falling to the ground as our other foot is up in the air the arms in this position are almost halfway as the pass to the next pose but they still slightly forward where they come before so it is not exactly mathematically half and half. It is also the lowest point for the shoulder to swing through with the arms in the generic walk much like a pendulum does when it swings back and forth in.
-
Up pose: In the up pose the plaintiff footage pushing our bodies up to our highest point will walk while the hips and spine are tilting back our lifted foot travelling forward and starting to rotate now to catch up for the contact position and leaving the heel along the way.
-
Down position: In the down position, the hips and spine are bending forward to their extreme whereas the arms are at the widest point in the lock this typically forgotten about.
Week 7: Animation Layers & Weight lift
We can use layers for animations, build them and blend them. Using these animation layers we can mix our existent {key-frames} with new ones without affecting the old key-frames. Also, we can adjust each layer, its weight and mode. How these modes works will affect the animation in a different way, giving the animation a different calculation. This mode could be additive and override.


Match moving, Time editor tool.

To make your waling cyclo longer you will need to use the tool Time Editor Match Moving. Also once you have selected the 25 frames you will need to duplicate those, within the timeline, select the general curve. where you have all your handles.

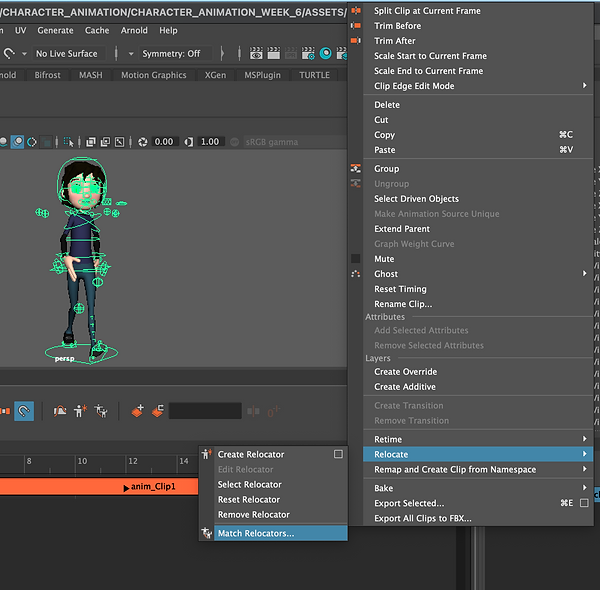
Then you need to select, the duplicated section of your animation} right-click over the duplicated section} relocatd} match relocators.
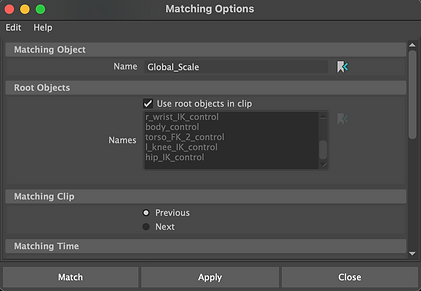
Then in the Matching Object window, you must have selected the global scale of your character. Also, the Matching Clip window must be on previous.
Weight Lifting

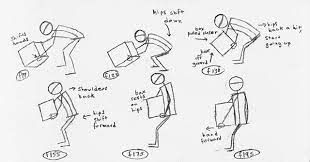
In addition to this week we had to make an introduction to our second assessment, where we will be need to create weight lifting animation with a default character, following references, from Caveacademy, and some other drawings from previous artist. I am getting some extra references for this animation from the animation survivol kit from Richard Williams.

The main step we need to do first is making the key poses on the right key-frames. In the case of the weight lifting exercise, I have used the same technique that I have used for the walking cyclo. Then between each main keyframe, I made some poses keyframe, and some other keyframes adjusting the ball to the hands and some others pose, I thought they weren't right. One important thing is to have the locators in the right location in the 3D space. Steps to follow are the next: create a locator for each hand to the parent to the big ball. Then create a third locator linked to the back of the ball it needs to be parented to the back of the ball, at the same time create the last locator, this locator will be the main locator. The main locator will be controlling the animation of the box, every other locator must be parented to this main locator.


Weight_lifting_process_01
Weight_lifting
Weight_lifting_02
Assessment_02_weight_lifting
Spiderman, lifting a car
For my second Assessment, I chose to make a Spiderman lifting a car. This was a long process, not just because of the animation, but for all resources, I need to put together to make it work. All the textures include spiderman textures and the cars.
Texturing_car
Texturing_Spiderman_begining of animation process
Full_animation_process
Full_animation
Different camera perspectives
Extra_shots
Final Animation
Week 8 & 9: Jum, Rig Recap, Animation references and Rotoscoping.
During these two weeks, we were catching up with some of the parts of the rigs, like the different nodes and attribute for face animation Jumping, and lifting using rotoscoping.
Video Referece
Disney Rotoscoping references


Final Result for the different task of Kicking and jumping

Render Settings
Week 10: Cameras and Animatics
This week we looked at Cameras focal length, depth field settings, audio and block out the animatics.
Depth of field, two ways of measurement
Distance Tool:


Maya’s Perspective Camera uses a 35mm lens as default which is fairly standard, lower focal length such as 8mm will look more dynamic though stretched. Higher focal length such as 85mm will tend to flatten the image. Focal Length in Maya mimics real-world camera’s and can be modified from the Attribute Editor after selecting the camera. Depth of Field in Maya is linked to F Stop as a lower F-Stop will create more blur (F1.8). Again this mimics real-world camera’s and can be modified from the Attribute Editor
Infocus

Outfocus
Animatics- Create Pose To pose blocked Animation
Heads up Display (Object Details)

Maya by default uses the Auto tangent type for animation key curves, this creates smooth motion or interpolation. We can switch the tangent type to In = Linear and Out = Stepped if we want to create a blocked in Animatic with the animation going from Pose to Pose. NOTE: Ensure that this is set back to Auto mode if working on your final animation.
Week 11: Lip-Sync Eleven Rig Controls & Viseme Blocking

The main circle control in the middle of the mouth can be used to adjust the overall positon (W) and rotation (E) of the mouth. It is named – H_lip_control Screenshot below left has the mouth Rotated (E) slightly to side and moved down (W

Main Control for the jaw rotation is the yellow circle at the chin namedh_jaw_control Rotate this with the rotate tool (E) to oven the Jaw

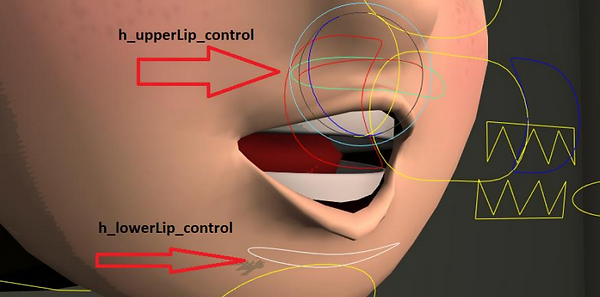
The Upper and lower lip controls named – H_upperLip_control H_lowerLip_control Can be moved (W) and rotated (E) to pose the lips. You would want to roll or rotate the lips outwards for an OW shape And inwards for an MM shape as shown on the left.

The Lip corner controls at either side of the main mouth control are namedH_r_lip_control H_l_lip_control You can select and move (W) these inwards /outwards and up / down to edit the shapes.
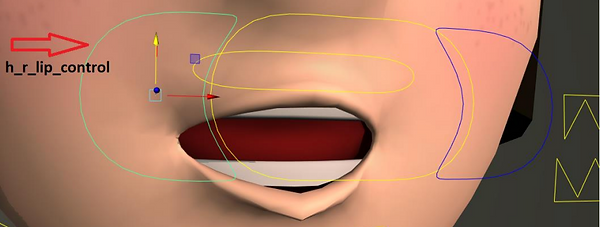
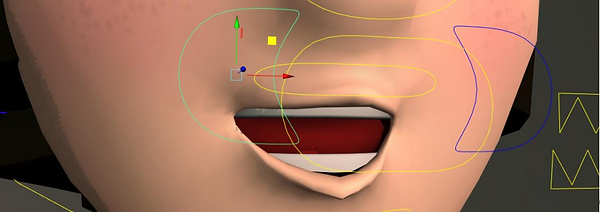
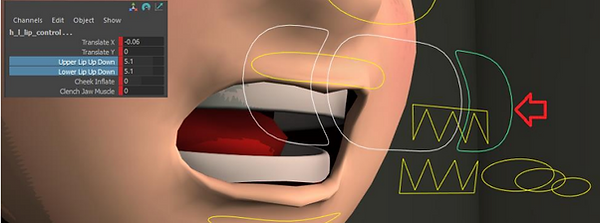
The main mouth control and mouth corner controls also include channels which can be used to raise and lower the lip corners and centre. These are namedUpper Lip Up Down Lower Lip Up Down Select the channels and middlemouse drag left and right in the viewport to edit values


To Manage keying our lip controls, we can create a ‘Selection set’ from the Create>Sets>Set menu The set will then be visible in the Outliner where we can right-click to Select Set Members.
We can also use Maya’s Script Editor (Windows>General Editors>Script Editor) to record our selection and save this script as a Shelf Button in Maya. Scripting can be used to automate tasks such as selection, keying and export in Maya.


Week 12: Camera's & Shot Sequencing.
A new addition to Maya is the Camera Sequencer, it is like a video editor inside of Maya.

Assessment_03_11_SECOND


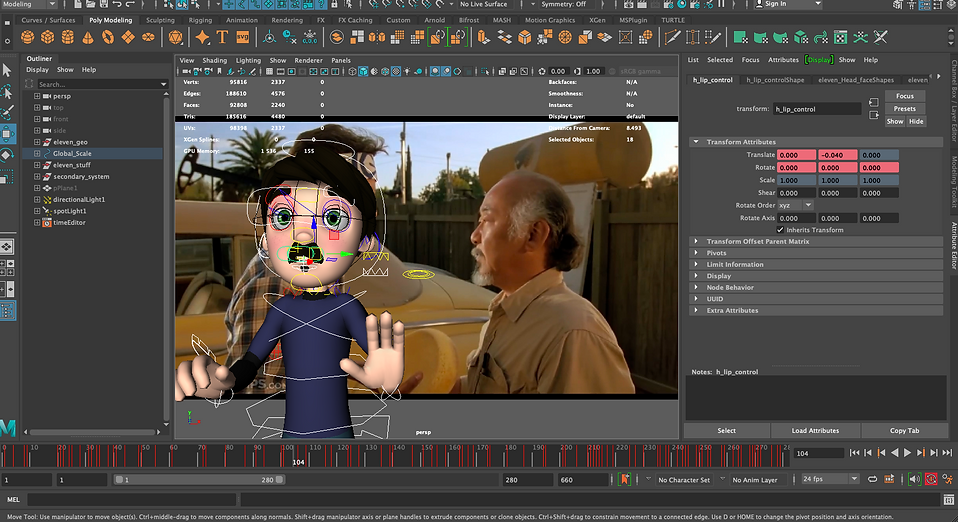

Original Clip
Colour
Black & White
Graph Editor
