WEEK 1: Overview & Intro to Unity
The first lecture was really good, we have started to look at Unity, the software where we are going to work in the next few weeks. I downloaded the assets and follow the instructions to install them. after all the installing processes Unity was there, ready to be used. I had set up the scene, playing with the interface and the assets that we have already downloaded.
Unity Asset Store has assets and plugins for free also you can find more content paying. the store can be found in the Unity software in the main window or by visiting the Unity website. Indeed I had to download the lowpoly environment pack for free to practice with some tutorials. We also have to import the packages and all their assets to Unity to make use of them.


The first video show how to import the assets, also we can see that the player is falling down even after the replacement of the file that we have to change from the utility folder. This error is happening because of the order of the elements in the scene, where the camera is located under the floor that's why is falling down.
In this second video, we have fixed the organization of the elements in the sample scene window, where the elements have been replaced in the right order. As we can see in the video the First camera player, is working perfectly, moving around the scene and jumping some the figure in the middle.
In this third video, I played with the assets that I get from the Unity package. Creating an environment where afterward I will try to place the asset for the camera player. It didn't work, trying to rescale the elements also the camera assets, but still not moving. the problem was the outset of the camera didn't have the same parameters as the height.
In the last recording, the problems fixed we can see how the environment is working perfectly and how the camera moves in every direction. Also, the objects were scaled to work perfectly, the movement of the camera player still the basic movement of any videogame left, right, up, down and jumping.

WEEK 2: Maya scene organization, sculpting, and displacement
Today lesson was pretty great, we were able to use Maya following Lee's lecture. Importing the same assest we have used last week in Unity. We managed to use tools like the perspective viewport, in the camera settings we've selected the attributes of near and far clip plane, changing the far clip plane to 30.000.,00, This change will stops the objects clipping at distance from camera.

In this window that it will appear on the right side of the screen, I able to change some of the camera attributes too as, Angle of View, Focal Lenght and the camera scale. The Focal Lenght it is really important to change the perspective of the object in the scene. Example in photography is not the same take a shot of someone with a 35mm to a 50 mm. We will see both pictures that the background are different even the face of our model.

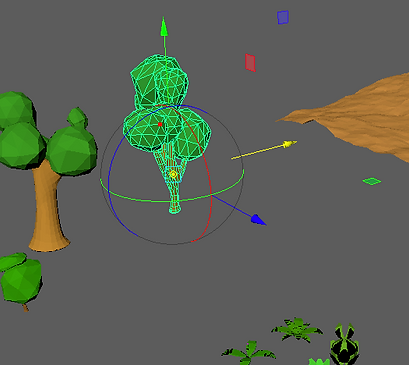
Here we look at the interfacce and how me a group of different figures in the scene like this tree, with different parts that we would like to put together. The creation of this group will make easy the movement of the elements in the scene.

Here, we use the shortcut to move the centre, This happens because the pivot goes directly to the centre of the scene, of the object, from where it was before, to the new centre that will be on the tree. Clicking on the figure then we use D(it is called the pivot mode. This will be applicable if the new figure is a group of different elements, in this case, will work.
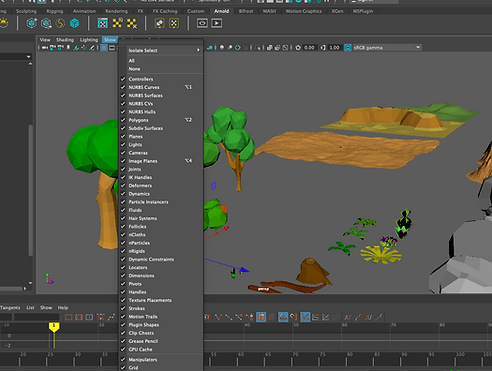


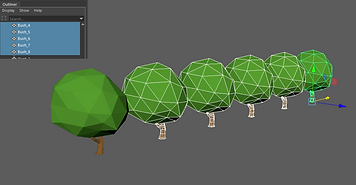

With this submenu, we can do so many things, like duplicate the elements with the same properties and edit then at the same time. after this process, I just set the main bush to edit his vertexes which will affect the other bush as they have references to the original.
Organization & Display

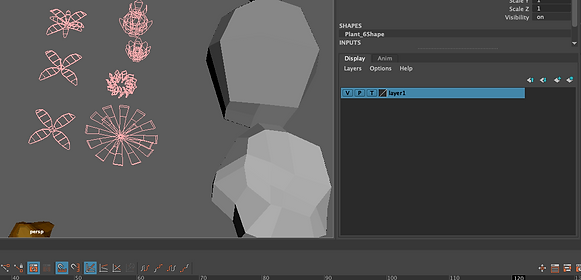

Comando+H will hide the object in the scene. We can make a layer from the selection, making esayer to hide or show the elements in the scene. The new layer created will be found in the right-side display window. V will make the object visible or invisible, T for template and R for reference. R will make the object visible but unselectable. These attribute will be applicable to every object in the selection group or per-object. In the left images will see that in the opened widonw we can find in Heads Up Display } the poly count wich will be really useful, for the selected objects in the scene.
Polygons} Vertex Normals. The Mesh vertex normals are shown in the viewport. This allows me to validate how the model is shaled in the viewport. F2 to soften Edge if you deselect the figure you will see how the angles have disappeared. In addition thanks to this view we are able to see where our vertex is pointing.
F to centre the object we have selected. 2 to smooth the object also we can use Smooth Mesh properties form the attribute editor. if I want the object as before, I will hit 1 to go back to the original shape.


I also duplicated the polygons in the object, then using the soft selection I was able to model the object in the way I wanted. The yellow is on the soft selection will be the part more affect from the changes you have make in your selection, same with red right around the yelow area. The black one will be less affected from this selection making the shape look progressively more affected from the soft selection.
Sculpting tools in a plane
On this occasion, I have created a plane where I gonna use the modelling, or sculpting, tools that Maya includes. I changed the main attributes of the plane width/height to 200. Then double click on the sculpt tool on the shelf. I changed the size of the brush, I can also do this with the shortcut by clicking on the key B or M to change the strength and size of the brush. I have also tried the other tools GRab and Smooth. The Smooth brush is like in Zbrush using shift to smooth the figure.


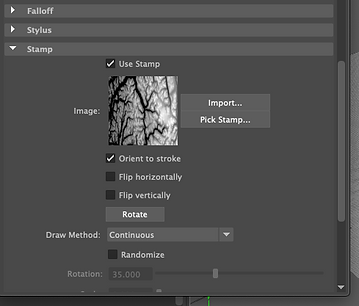
Also, I used and images to sculpt shapes using the sculpt tools in Maya. We can use this image to create even the environment using a big brush with our images. The image will be used to create the displacement.
WEEK 3: Environment Modeling and Texturing
Today lesson, we were looking at the environment detail in Jungle Book from MPC(VFX) and EA Dice Star Wars. Displacement details how are created by different brushes in Maya and Zbrush. Reducing the number of poly count. We also look at the textures.com, where you can download many different assets to play and create your own stuff with them.
I have recording myself following the steps of how we should bring our leaf, and make look real, playing with the alphas, lighting, displacement. I used the hipershade window to change all the attributes we've say before. The video is a timelapse of the process. I have also created a tree using the same leaf, how it is made in videogames.
in videogames companies using others assets to create their plants and trees. In this case, I have just used one leaf for the same thing. It is very important to enable the two side lighting, otherwise we won't be able to see the images, on both sides.
Maya-Viewport displacement, the scene file is set up with Blinn material on a plane.The file1 texture file sets the displacement which is visible in the viewport. The file2 texture file sets the Color and Transparency (Alpha)
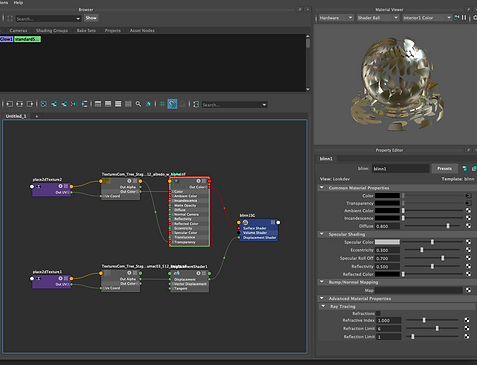
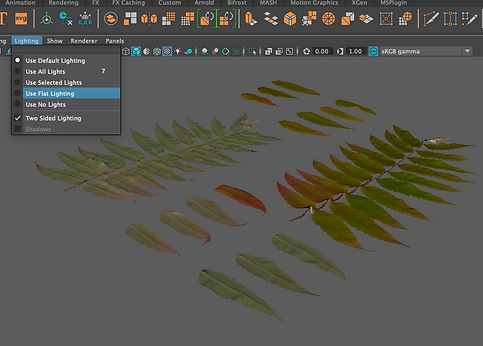
In this first image, of this process. I have click on (Two sided lighting) to make visible the texture the displacement and the images in both sides.
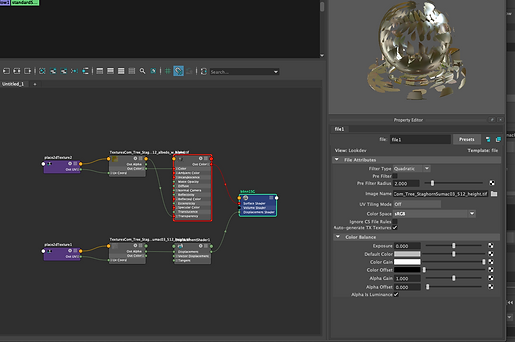
The their image, is the hipper shade, where, I have click on the file attributes (displacement) and replace where is the images name for the alpha.
The fourth image is the displacement already modified, with the alpha applied in the image. We can see that the leafs have now much more detail that in the first image.
The image below shows, how I used the curve tool to make the branches.
Second images, I clicked on the hipershade, to opened, then we will go to the displacement inour graphic, and select the alpha for the displacement. The alpha will bring all the details we need. it is reflected as black and white.
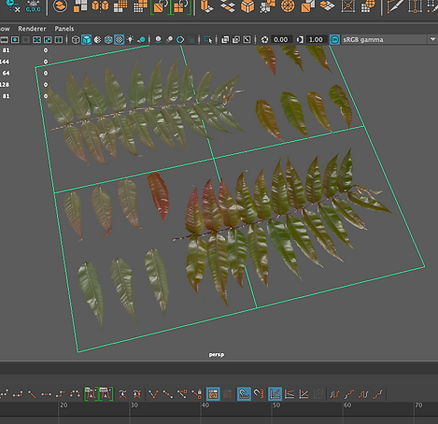
The fourth image is the displacement already modificated, with the alpha applied in the image. We can see that the leafs have now much more detail that in the first image.


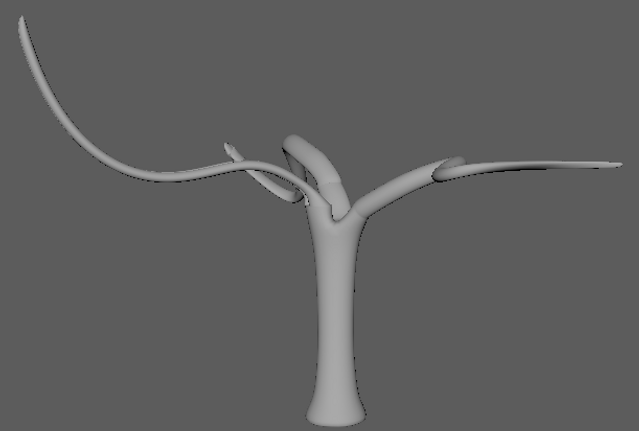
The fourth image is the displacement already modificated, with the alpha applied in the image. We can see that the leafs have now much more detail that in the first image.
WEEK 4: Lighting
Lighting- Raytracing
In WEEK 4, I was interacting with Maya's Arnold Renderer, Viewport 2.0 & The Unity Game Engine.
- Depth map & raytraced shadows, almost the same shadow but depth shadow will render quicker cause doesn't have the shininess and specular, on the objects.


How to iluminated our figure on the scene
First we need to importe the figure we are going to iluminated, in my case a horse. Then we continue with the basic settings in our scene this meant to relocated our figure in the 3D space. Change the attributes/ Layer editor window.
Maya have many lights options, and inside these lights, we have many others attributes we can modificated.


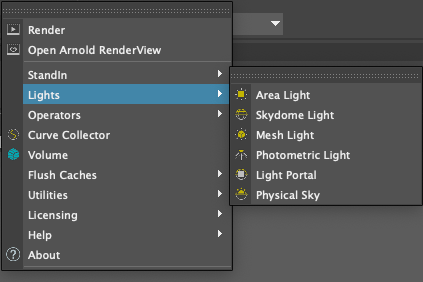
We gointo to Arnold, then lights, select Area light. Relocated the light on the scene and change the settings (scale&position).


The towo images above show us the light editor, in her we can created, add and modificated our lights settings. In addiction we can see through our light clicking in the small icon with a flashlight and eye. Intesity and exposure will work together to give us the perfect illumination, also to see our character in the render view. The Samples will define the clarity and detail in our character.
We can find more attributes in the spotlightshape1 window, next to the viewport. Here we can change attributes as cone angle the form of our light, the shape, to circular, penumbra angle, dropoff and the color.

We can add to our lights a lightblocker. We will find this in the attribute editor of our lights. The lightblocker can be scaled to cover area of the figure and modify the desentiy effect.
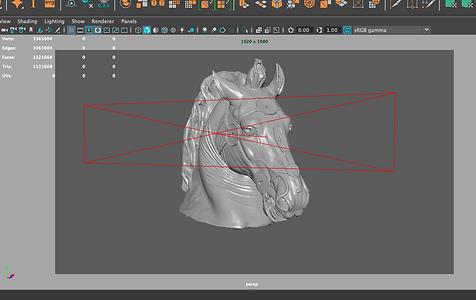
In the left image we can see the resolution gate. This show as the framing that will be render later on. We can find this icons above the viewport, leftside also you will find there gate mask, and some extra information as the framing resolution.
Arnol render settings, we can modify here the image size, the resolution of our final render, the samples, the camera renderes.


These to images above shows, some different attributes for the viewport, where we will be allow to see a close final render of our scene.
Unity/Real time lighting
Going through the Hierarchy view, the light has the soft shadows enable. Unitty and Maya have so manythings incomon as the lights, and the way we iluminated our scene. We have Spot angle, cone angle directonal light spot light. All this light named before works in the same way as in Maya.
WEEK 5: Maya Organic Modelling
UV unwrapping and Zbrush Detailing
During Week 5, we were looking at UV. It is essential that models are properly Unwrapped using the UV Editor tools in Maya before texturing. Cut model into separate UV Shells for Unwrap by using the cut tool in the UV Editor. In addition, we were told to instal the OBJ file type ( Windows> Settings> Plugin Manager, to load the objExport.mll plugin, to export the organic model we have made in Maya to Zbrush.
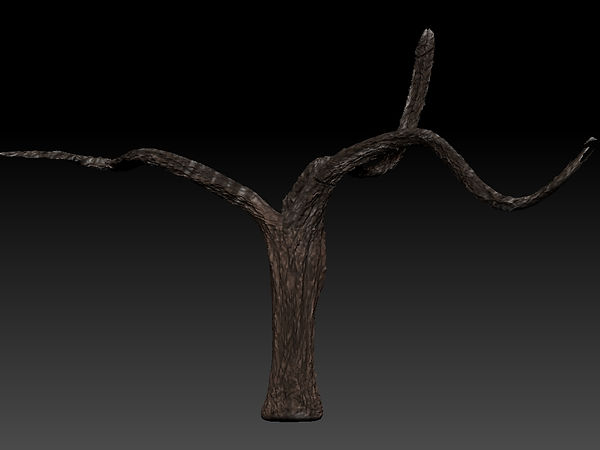
The tree on the left side is already in Zbrush, with the details made with Alpha brush. Then I Unwrap the UV to export then back to Maya to use it as the displacement and textures. Also with subdivision will make my model look better, with more details. In the video below I show the entire process, of how I had made this tree. Following the instructions from the lecture.
To export the UV and the mapping to Maya we need to duplicate or model created subdivisions and bring them down making this new model, a low poly version of our original model. We will export the maps to Maya.
Now in Maya we will select our object, go to the hyper shade, then Bump Mapping, in the common material attributes and select our normal maps there.
Tree Modelling 1
Tree Modelling 2
In this second tree I have been following some tutorial, to make a low poly tree, was quite fun. First I have made the trunk using different types of tools. Always trying to keep the shape of a tree. Then brunches were made, and last one the bushes, four simples spheres.
Now is time for the UVs, we will need to open the UV editor window. the select unwrap, and try to get the best and simple definition for the shape of our tree.
To continue we will need to export the UV maps to photoshop PNG OR JPG or TIFF.


Jumping to Photoshop, We will select the selection tool, and select the or different parts to later on full fill them with the colours we want.
To do this keep command+ deleted with the colour you want.
After this process, We need to import the file to Maya. Add a Lambert material to the tree and in the base colour select our file.
With this process, We will see our tree much more colourful.
Render 1 (tree2)

Render 2 (tree2)

MAYA & PHOTOSHOP PROCESS OF THE SECOND TREE
Tree Modelling 3
The third tree was much more complex. First We have to start from the brunches, I downloaded the assets from some link o have found on google. Then imported them to Photoshop, created an alpha. Also copied the layer 2 times to add some blur to the leaves in the brunches and add a third layer which will be a green background.

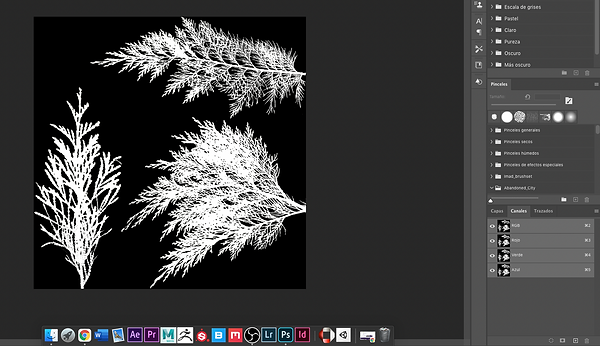


The Images above will show briefly, the process in Photoshop. As a second part of the process, We will need to create UVs and 2 figures more the Trunk of the tree, the end of our brunches that later will link our brunches to the trunk to complete the tree.
The video below shows how I have been followed the process to create the tree, also adding some lights as area lights, skydome and fixing some problems that i had with the transparency and the opacity of the figures in the scene.
Tree Modelling 3 + LIGHT+ FINAL LOOK
Render 3 (tree3)
ORGANIC CHARACTER SCULPTING / LIZARD/ GODZILLA KING OF THE MONSTERS
I had decided to create a model of Godzilla King of the monsters instead of a lizard, but still being a lizard but much bigger. Here I demonstrated my skills with Zbrush and the process I have followed, also my references for this character come from the movies if they need it. For the skin, I followed the same process for the first tree to import everything to Maya, ( MAPS, UVS)
WEEK 6 & Assessment 1:Procedural Environments (Maya/Unity) Materials setup Normal/Displacement
Extra Research: BIFROST, MASH & XGEN
Lighting, Environment, Megascans, Bridge, Mixer & Sustain Painter & MESH RETOPOLOGY IN GODZILLA.
In Week 6 I have decided to make something together will all the material and the knowledge We have been gained the past few weeks. I put my Godzilla in a new environment. This environment will be a landscape with some mountains and some trees. Also, I have added to my research a sea, lights.
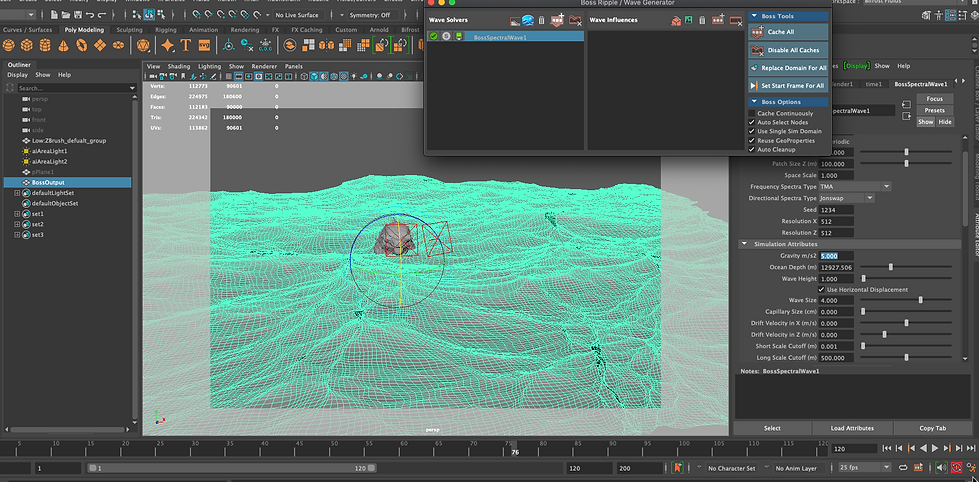
We says the Images number is the frame selected to be the foam of my sea, also needs to be in RAW
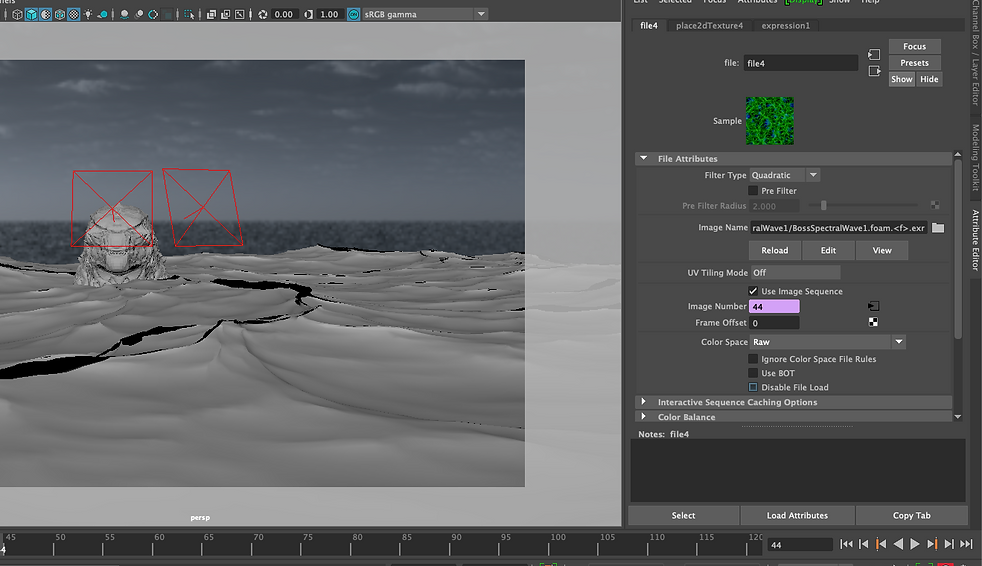
In the image below I am selecting I have run the animation of the water to select some alphas to created the foam for my sea


Render 1 (Godzilla + Bifrost + retopology)

Render 2 (Godzilla + Bifrost + retopology)
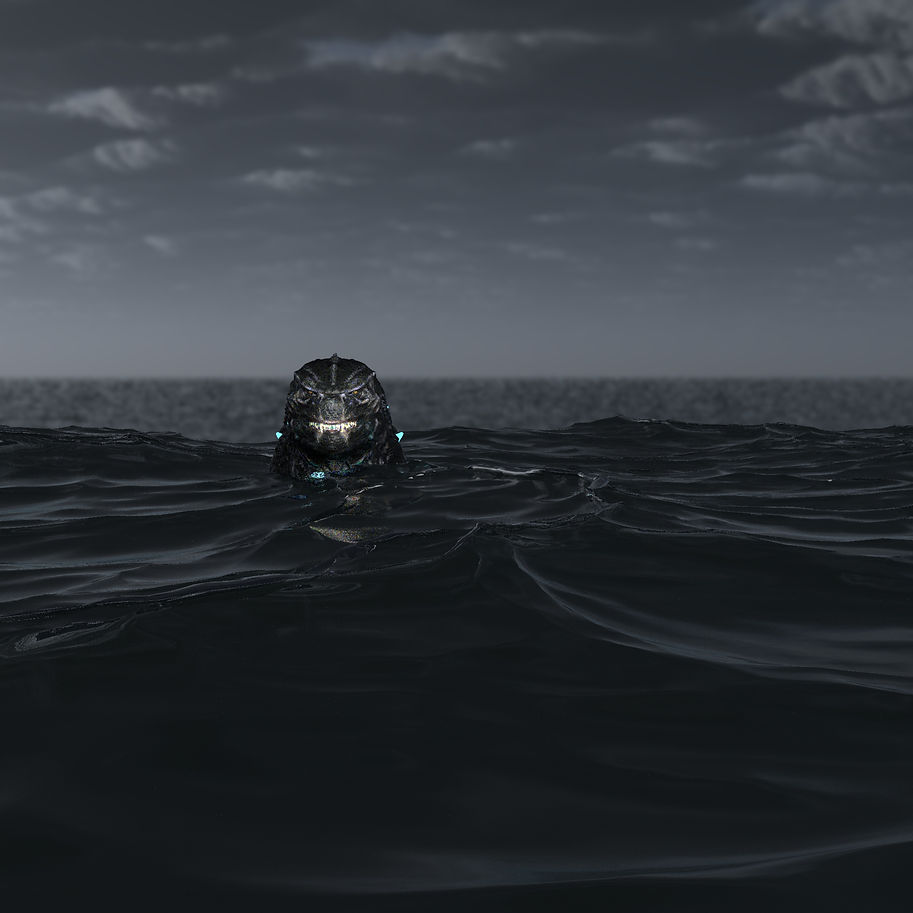
Video with I have used Bifrosta and the process to make this Renders
SIMPLE ANIMATION OF GODZILLA CROSSING THE SEA
In the new few images below, I am working on the int mountains, first, they were sculpted in Maya then, I took them to Zbursh to made the mapping the Uv and the details. Second I took the SUBSTANCE PAINTER to give them the colour they deserve also to bring life to the details I made.

Once more in Zbrush followed the process of Mapping, creating the low poly version, to increase later the details in our final renders but first, we need to pass our mountain through Substance painter and also grab some extra textures from the bridge and created some in the mixer.
Substance painter, is super great at bringing life to everything, adding a different mask to our layers, this process is better seen in the video below where everyone will be caple of following the process.
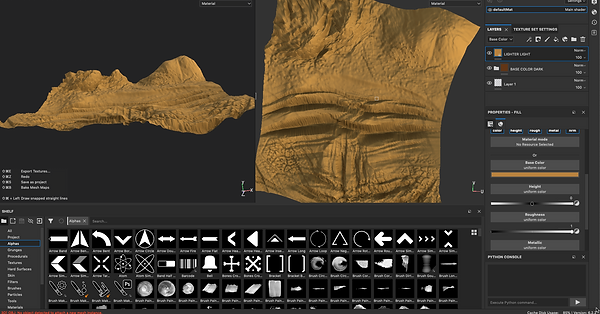

Mixer, pretty good for details and resolution of our environments or textures we will like to create, for anything. You can import them to bridge to create your own presets. These textures will work perfectly with the light and the AI standard surface material for the Arnold render. In the left images, you can see the floor I have created for my jungle in the mountains.
Render 1 (Godzilla + Bifrost + retopology+ SUBSTANCE PAINTER+ MIXER+BRIDGE)
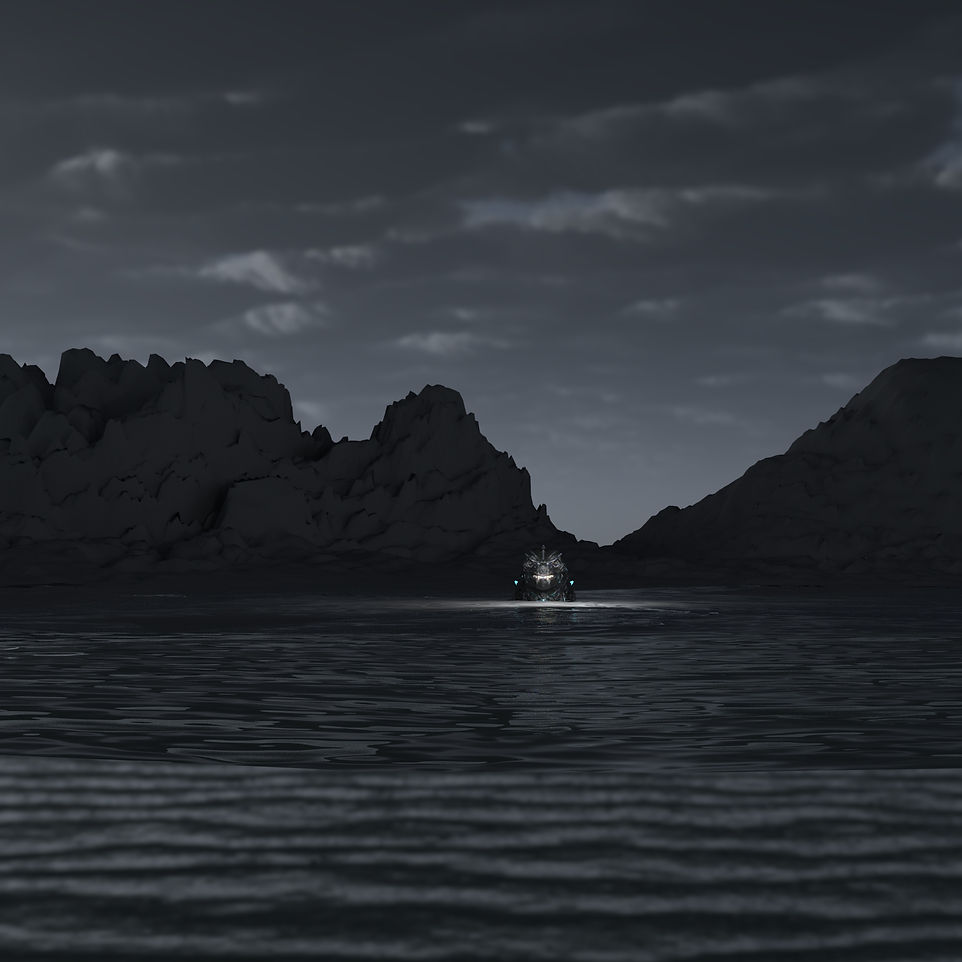
Render 2 (Godzilla + Bifrost + retopology+ SUBSTANCE PAINTER+ MIXER+BRIDGE)
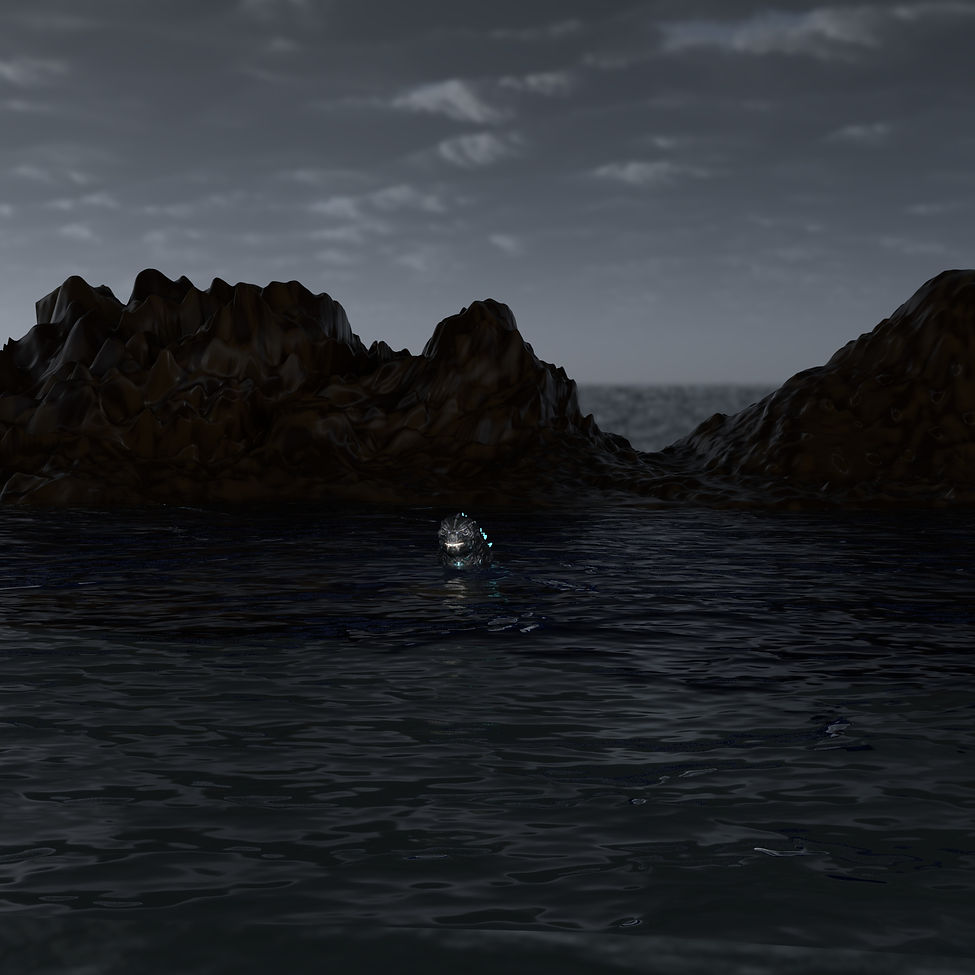
Mountain sculpting, Details, Substance painter, Mapping & UVs


XGEN & BRIDGE & MIXER
XGEN is a plugin that will help me in the future to generated randomly forest, also hair. It is super useful for environments and landscapes. in the video below I showed how I being played with plugging in Maya, also with some assets that I have already created in Mixer.
WEEK 8: Substance Painter
Todays lesson was about Substance painter, how to import file from Maya, OBJ files, with UVs ready to work. We can see in the images below the display of the software. On the right of the UI we can see the material Layer Tab. I the Imported Layer tab we can see that there are colour and normal map material channels for the model.

In the left image, we can see the UV view and how the image is the layout, in the layer window, 3 different layers. The texture in the images was made from different Layers and mask.
In the second image, I have applied a new material to the skull, Iron RAW, The skull now will be shinning as the Iron does.
Then I applied a fill mask to change the colour of the metal to red. Here you can play with the roughness and the transparency give a different look to the skull.
The next two images show the viewport where I can change all the attributes for the different materials, add new materials, different type of mask, fill, edit the scale of the image, play with the alphas and so many other things.
I could also apply another material to the skull having in the occasion two. Then divide the skull in two playing with the opacity or even using a brush to make it easier.


Here you can see how I have applied the alphas with the different shapes, you also can add to an alpha a mask.
At the bottom of the images, you can see the window with the materials, but you can select other attributes like alphas, different brushes, different materials, textures. To have the edges grungy the only thing we need to do is revert the mask with the red color and also apply different material that in this case was Metal EDGE wear.
In this viewport, you can choose different settings, like the resolution of the image, the resolution of the mesh.
You can also edit the way you see the figure, jumping in between the to different perspectives 3D camera view or 2d or both as we have been seen for this lesson.

WEEK 9: Substance Painter & Maya
Week 9 was about substance Painter and exporting the mesh and the textures to Maya, using the examples that we have in the substance painter, open the substance example file Jade Toad from file>Open samples and go to File>Export textures. From the export document window, go to the configuration tab and select the preset Arnold 5. (AiStandard).
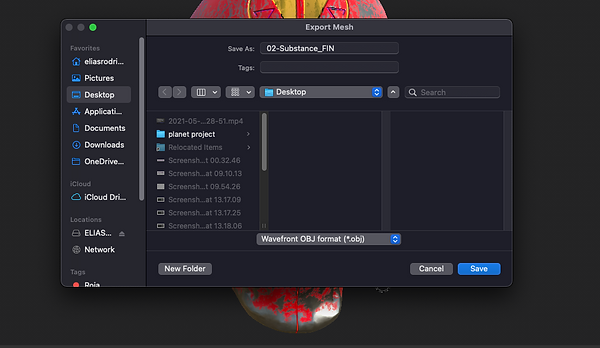
In the export window, you can select the here the size of your textures and mesh. to export the mesh go File>Export Mesh. From the Export Mesh window, select Wavefront OBJ format and click Save to export the Mesh to the folder in my mac.

In the image above we can see where I have taken the example of the JadeToad. Then we go to the exporting section where I selected the first Export textures. In the image below we can see the output maps, ( base colour, Metalness, Roughness, Nomal, Height, Emissive and AO). These maps are the Standards for the Arnold render. on the left side, you will select the presets for your maps, even Unreal Engine or Unity.

In the third image the Toad is already in Maya, the next step is to create the material for the Toad, We will open the hyper shade and created an AIStandart Surface for the Arnold Render, Then we will go the Aistandart attributes and one by one apply the maps in the right places. In the case of the Toad will be in Base colour, Metalless, Roughness Normal Camera, Bumping map. The bumping map should be Raw and with the Alpha luminance activated.
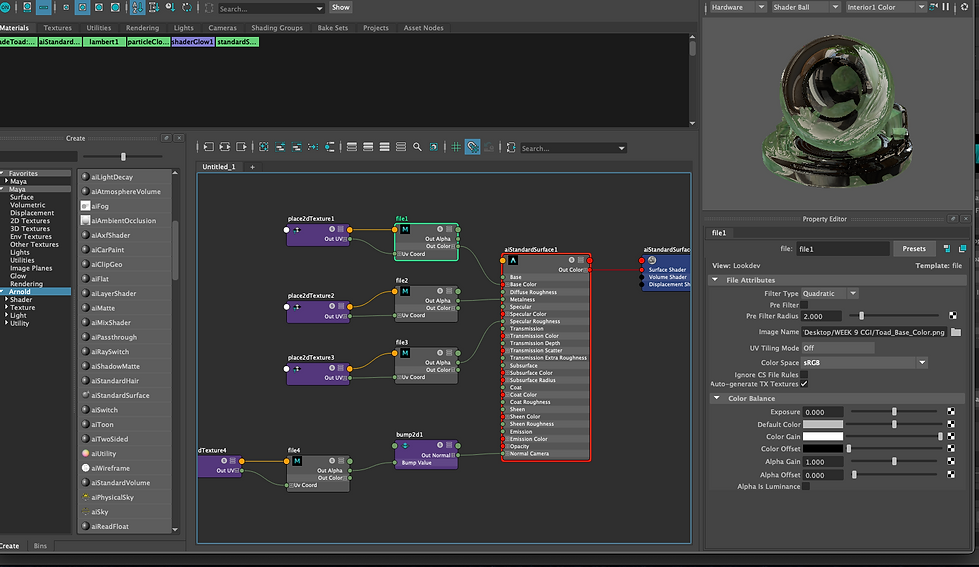
Video Workflow for the JadeToad
Final Renders with Arnold


VIdeo Toad all around
WEEK 10: Substance to Unity & Unreal
During week 10 we were looking at exporting our mesh and maps from substance painter to Unity and Unreal Engine, for me was impossible to work with Unreal Engine cause of my computer, but I was able to work through Unity using the workflow we learn in class.

To export our textures we will go to files the click on export textures.
Then we select here our preset in this case will be Unity, with the preset, we will see the Output maps in the middle view window. We need to add an extra map, the AO. to do this, we will duplicate the last map, change the name and add the ambient occlusion to this layer.

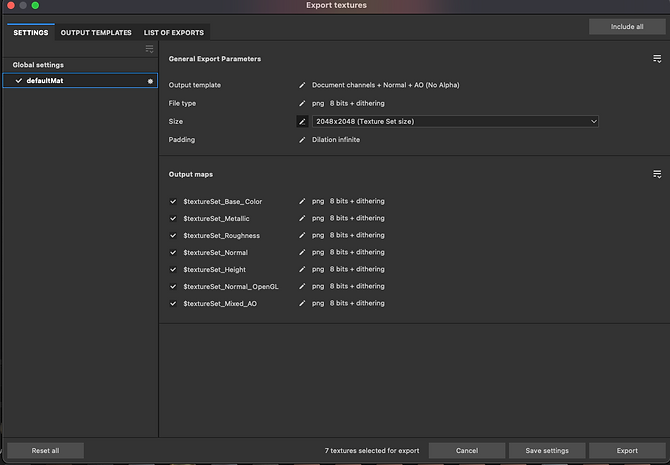
Here we will need to select the size of our textures or mesh and the location. Then we will be ready to export.
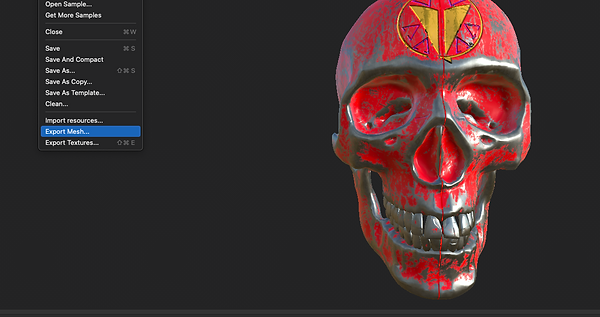
The same process to export the mesh, in this case, we don't need to add anything just to chose the location of our document.
This part is really important cause the type of file needs to be Wavefront OBJ Format, then just save the file wherever you want.
SUBSTANCE PAINTER & UNITY WORKFLOW
It is very important to locate the maps, in the right position. So albedo will be Default_base_color. Nomal Map= defualt_normal_openGL. Metalic=default_metallic and oclucion= default_mixed_AO. From the inspector, click the Fix now, button under the Normal Map section to ensure the normal map texture is correctly identified as a Normal map.
WEEK 12: NURBS & Poly Surface Modeling
Week 12 we were looking Nurbs, how to using images as references to model our cars, spaceships, guns. You will need to import the first two images one front view and second a side view of the same object, then you will need to project the image in both side of the plane that you have created to protect your references in my case was the spaceship of the Mandalorian, I still working in this project but here is a video of the workflow I have made for this project.
Maya workflow for Nurbs and The Razor Crest
ASSIGNMENT 2
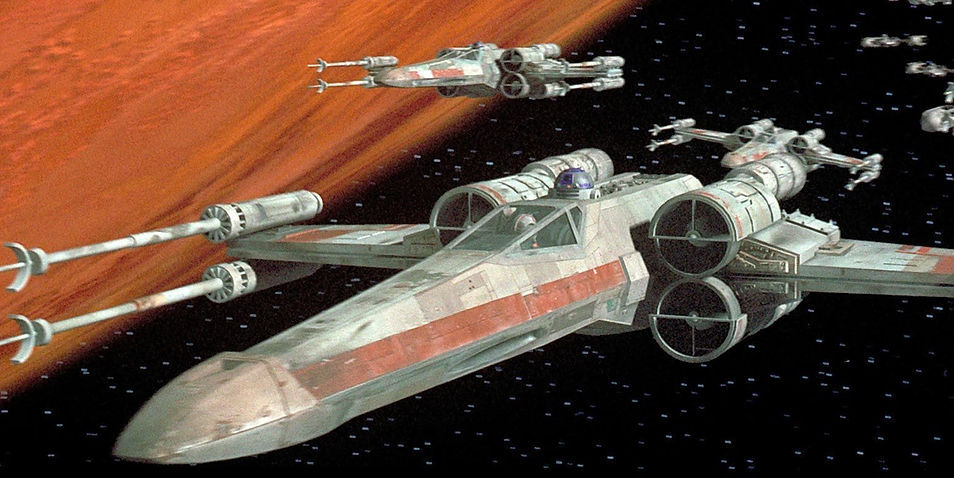
The X-Wing will follow the needs for assignment 2 for CGI, this project will need to cover these areas: Environment modelling and texturing organic modelling and detailing, material mapping (normal/displacement mapping), Substance painter (procedural materials and detailing), real-time shader setup and Maya shader setup.
X-WING MODELLING WORKFLOW IN MAYA
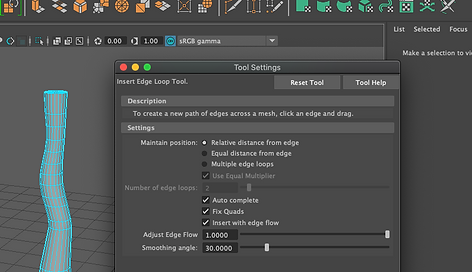
Here we are again with some more modelling, in this case with Xwing from starts wars. To begin with the tools I had used to create it, bevel smooth, extrude, insert edge loop, reverse to reverse the polygons of the pilot cabin, combine, separate and fill.

For the Uvs and mapping, I clicked on the Uv, then Uv editor, then auto unwrap, then organised my Uvs in the Uv space. ,
Here in the Uvs space, I was organizing my Uvs, trying to move all of them into the same Uvs space.

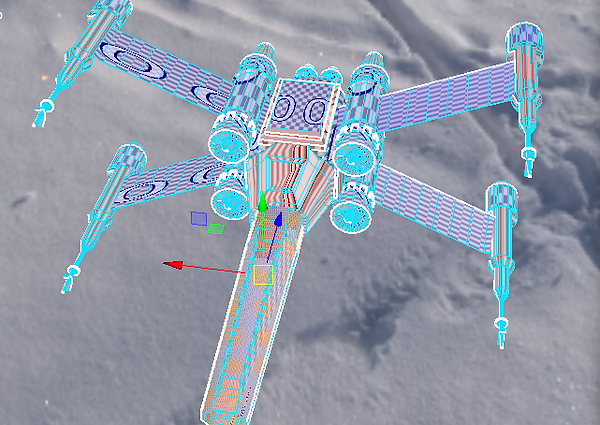
In this image you can see how the Uvs are located on the Xwing, every single part is separated from the others.
COLOURING AND TEXTURING IN SUBSTANCE PAINTER, WORKFLOW
I imported my FBX file to Substance Painter, keeping the resolution that a wanted for my Xwing then, no auto unwrapping cause we will use the Uvs from Maya, click on import, then go to texturing settings scroll down until you see the baking bottom. Then just follow the video and see the workflow.
Here is the Mesh before the texturing and the colouring

SHADERS AND LIGHTS WITH MAYA WORKFLOW
In the two images below you can the shaders for the Xwing and the location of the lights and the skydome which is also illuminating the scene. First I have applied an Ai standard surface to components of the Xwing, then I applied the maps to the right location. As you can see in the images for every part of the Xwing works the same. Basically, base colour, metalness, roughness, normal camera, and displacement.

LIGHTS LOCATION IN THE SCENE

TESTING THE ARNOL RENDER JUST WITH THE SKYDOME

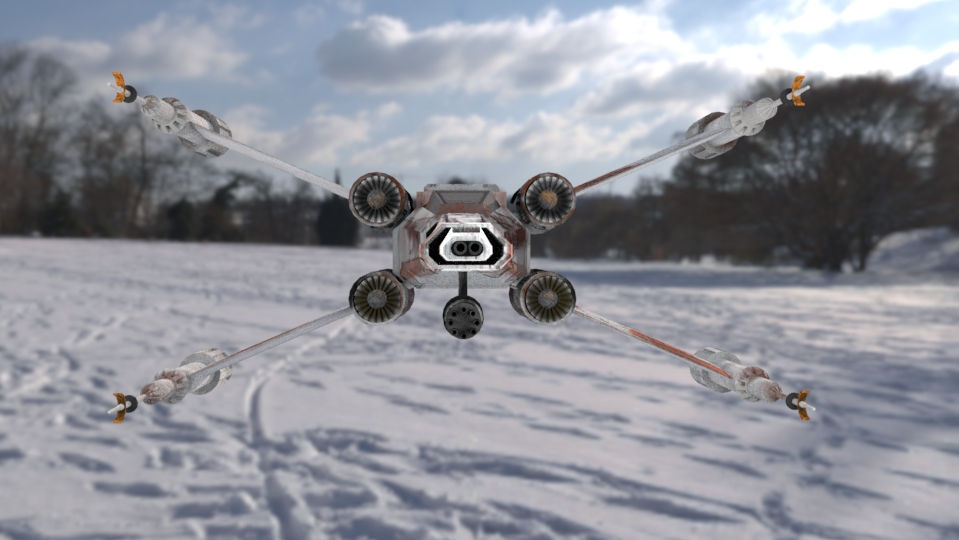
ARNOLD RENDER WITH THE 3 LIGHTS + SKYDOME
RENDER 1

RENDER 2
RENDER 3
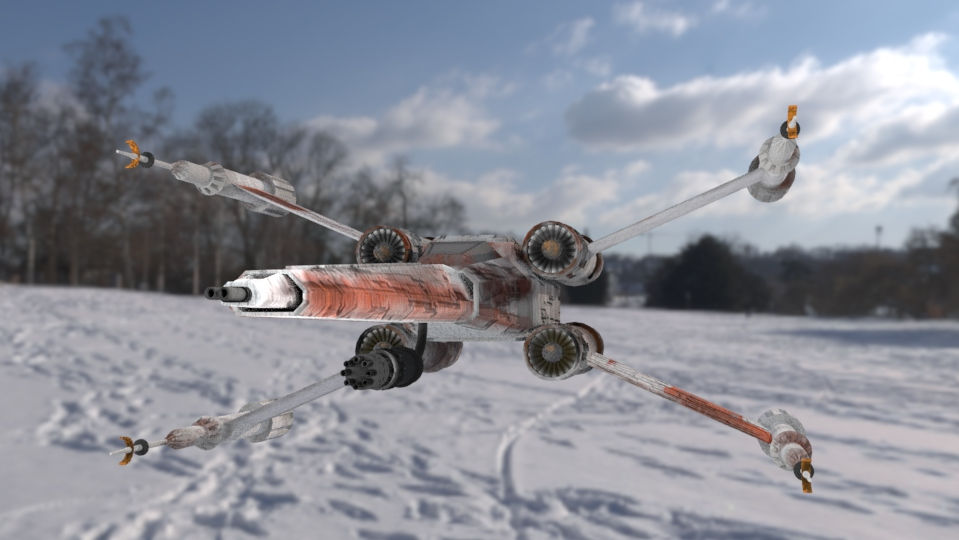
EXTRA RESEARCH WITH UNITY
I also wanted to try to export my X-Wing into Unity, and apply the textures and shaders. The next two images show the before and the after. Also, the video below the images that shows the workflow and the process that how we should make it.


UNITY WORKFLOW
FINAL RENDERS

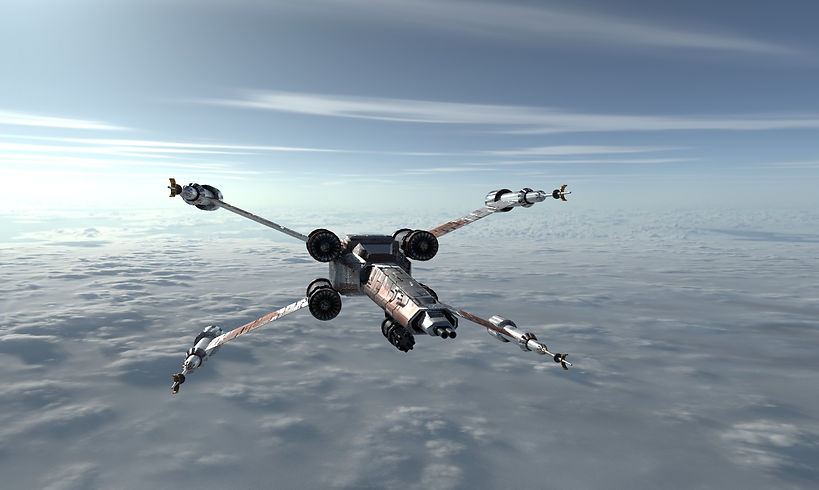

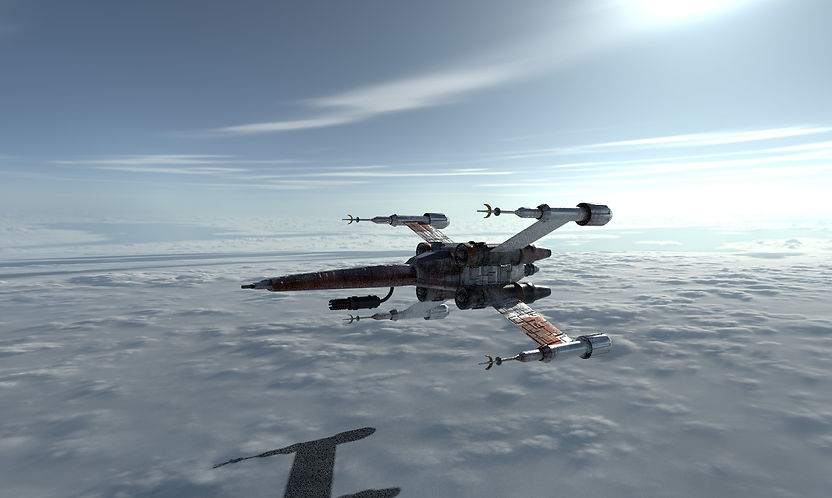
ASSIGNMENT 3: PERSONAL DEVELOPMENT
My idea was to create a wormhole, for the X-wing, also to compose everything a create a scene with all my resousers and knowledge of the tools we have learn during this year.


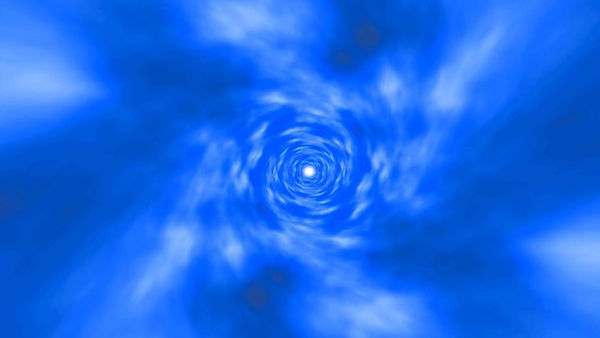
Of course, my references from Star-Wars, to get better results for the Xwing.
I have tried to replicated the same effect same process same workflow as in the movie, using After Effects, but this was the close I get with it:
JUMP TO HYPERSPACES
WORK ARE IN AFTER EFFETCS

This will be used anyway for another idea in the future, but for my wormhole and my X-wing flying through it wasn't enough, that's why I came with the idea of make the wormhole in Maya.
WORMHOLE+SPACESHIP+HYPERSPACE EFFECT
EXAMPLE 1

Here we have some examples to see the basic idea and how the elements are located in the work space. the camera and the lights are placed in the scene to but hide from the screenshots
EXAMPLE 2
The wormhole was made applying different surface shaders and later I have animate the UV rotation, also I applied 3 different grids to the colour lines and 3 different shaders. i have some extra noise to the texture.

EXAMPLE 3

EXAMPLE 4

WORMHOLE WORKFLOW
I created the camera with the wormhole attaching the camera to the curve path, in the animation window, also needed to fix some cameras moves to adjust the frame ratio and duration of the animation cause the camera was flying too fast To continue with the project, I have exported from my second assignment the X-wing as an OBJ file, including the lights and the textures and shaders. Then imported the X-wing into the wormhole project and set up everything. The second step was to attach the lights to the X-wing and then the Xwing with the light to the curve path, including all the adjustments to the camera animation.
LIGHTS, SPACESHIP, CAMERA, ANIMATION, WORKFLOW
I did have some errors in this second process with the Xwing textures, I did not know why every time I opened the render setting s my textures disappear, so in the end, I decided to go with the Harward render 2.0.
The third part of this process, which is to select the planet I want and make the sequence, with the planet in the background and the X-wing jumping to the hyperspace leaving the planet behind.
The planent I selected is Mustafar


This project began as a personal project during my second semester in the Visual effects course. the idea was to make the planet in 3D and use it for the intro of my showreel in the future.
The planet is first seen in the 3 movies of the star wars saga.
MY RED PLANET BASED IN MUSTAFAR A PLANET FROM STAR WARS
FINAL RENDER MY SHOWREL AND INTRO OF MY DIGITAL SKECHBOOK
In this final Render, I have worked all the way through After Effects and Premier pro. Now I can apply this awesome replication of Mustafar 3D text to make the intro of my showreel. The image below shows the work area and all the layers this project as an individual project have before the final sequence/ composition with the X-wing.

AFTER EFFECTS & PREMIERE PRO WORKFLOW FOR THE FINAL SQUENCE
After some colour correction, masking, animation and some extra effects. the sequence is ready. The steps I have followed to reach these results in After Effects and Premiere Pro are, import everything to the after-effects composition then mask the areas ai would like to see also animate the mask to follow the Xwing and the Flare. In the video you would see the entire process in after effect.
Jumping to Premiere pro, to create the sound of this video, I have selected from my library of sounds, that a got for free on internet.