Week 1
Proportions of the Skull & Anatomy
Proportions and differences between female and male skull. Investigation and exercises in how to understand the different features in the female and the male skull structure.
- Bone positions
-Size
- how to highlight a female or a male key feature to make a quick differentiation of gender.
Our first task is to point out the different parts of the skull.

FEATURES OF THE HUMAN SKULL


FEMALE
MALE
DIFFERENCES BETWEEN FEMALE AND MALE
Lightbox to chose a project or a tool we wanna use. We change our Standartbrush for the Claybuildup that grave uses the feel of real clay. Using the key Option in mac we can reverse the brush to build down instead of up. Claybuildup brush is the most used brush for sculpting in Zbrush. Space is another shortcut for any other tool mya may need in the future, you can change there brushes, since, color, etc.
Most used brushes
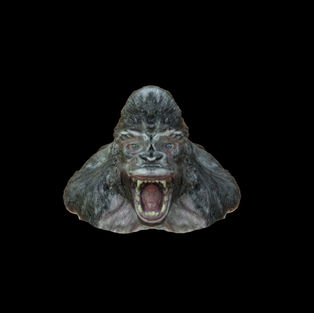
Final render model of the first face we have made, using the web Sketchfab, where you can see a final result, with better lights, and smooth movement.

Topography view of the polygons

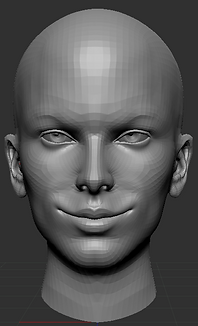
Front view of the first face


This is the window where we can find the most used submenus for our projects, like tools we are using, division of the polygons to get better results in our modeling and our friend Dynamesh, that gave us some extra polygons where we need them.
Timelapse of the first face process
Week 2
Nose
.jpg)
Thanos


Samuel L Jackson


Ian McKellen


Week 3
Mouth

Tom Hardy


Angelina Jolie


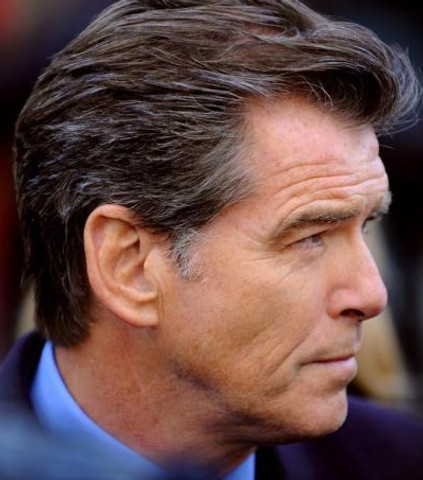
Pierce Brosnan


Week 4
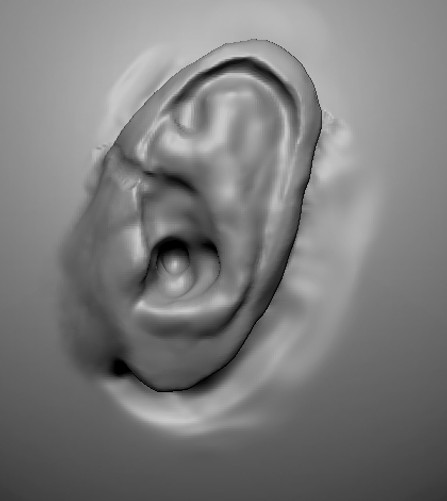
Ear


Arnold Schwarzenegger


Hugh Jackman


Harrison Ford



Week 5
Eyes

Josh Brolin


Jackie Chan


Macaulay Culkin


Week 7: Villain & Comparative Anatomy
Meet my Villain SS-rilla

I been working on SS_rilla, 2 days, and finally is here, I used photoshop many different brushes and many colors. I thought that a futuristic Gorilla genetically modified you know the classic powers, super strength, smarter than anyone else, with the mind of old scientific naZi man, will be really cool in the future. I took the idea from the week 7 lesson where we have look through the skulls of a different kind of apes. The gorilla was the most awesome for this character, his skull is really powerful compare with the other apes, and his brain is really protected.


Week 8 & 9: Villain Fat & Neck

During this week we were looking at the fat in human faces and how they affect our facial expressions.
those points in the graphic above represent the areas where the fat is located. I will play with these facial fat features and apply them to my character. My character as a gorilla will have some similitudes with humans features, it is said that we are related.


Week 9: Villain mouth open.

Following the tutorial fin week 9, where we were taught how open the mouth of our character, even if he have the mouth close. The steps are quite simple. First, we have to mask the area of the mouth that we need to open. Second, invert the mask just to have selected the chin and the area below the upper lip. third, and the last one, change the brush to the Move brush and take everything down. This process will leave a hole or an empty area where we can open and create our new mouth.
Week 9: Villain Modeling evolution.
In this section, my gorilla has already the basic muscles and features where we will add some layers to define facial expressions.
In the next section, we will look at the color evolution and how it looks with the hair textures I had created manually


Final images with muscles & hair texture ready to be colored.
Week 10: Villain evolution with color.


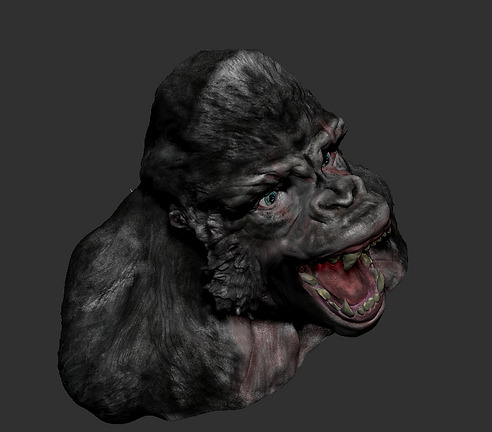


PolyPainting and Spotlight: Texturing
For texturing, there are two major techniques in Zbrush: 1- Polypainting 2- Spotlight. Polypainting allows painting on the model's surface. Spotlight is a painting system that enables us to project an image to the surface of the model using intuitive sculpting and painting brushes.
Assigning base color and material
Always use Fill Object before painting. It allows laying down a base color for the tools. To do this, make sure the RGB or MRGB (for both materials and color) button is on in the Draw palette. Select a suitable base color and material to work with. Go to Color > Fill Object.
Note: Turn off Zadd when painting on objects.
Note:
To paint colors: Spray + Alpha 07
To paint veins: DragRect + Alpha 60
To paint hair: Claybuild+ Alpha 60
To paint some texture on the skin: FreeHand+ Alpha 32
To paint some extra texture on the bullets holes: Freehand+ Alpha 31
To paint spots: DragRect + Alpha 01
Note Press C on the keyboard to grab the color from where the mouse hovers over.
In the end, we can find the final renders with some different details that were made with the mix of these brushes


Hairs
Different ways of making hairs:
-
Sculpting hairs using Clay Buildup brush. Use different sizes of the brush to add details to the hairs. Also, after sculpting the base, use Dam Standard (with and without pressing Alt) to give more definition and make a parting maybe! Note: this technique is handy for 3D printing because, in contrast to the second and third techniques, it can be 3D-printed.
-
Using FibreMesh. To tidy up the hairs after FibreMesh, use groom brushes (B - G).
Note in the case of my monkey needs a different outfit
To sculpt clothing: use the Extract function. Under Subtool -> Extract.
To tidy up edges: use Polish Crisp Edges under Deformation.
To import a logo for clothing: DragRect -> Alpha -> Import.
Metallic objects & IMM Brushes
IMM brushes: IMM Parts is one of them. What the brush does is similar to appending objects. We can choose what object we want to add with IMM parts. Like in my case I used some basic metallic forms to make the back of the monkey look more bionic. After his catastrophic experiment.
Week 10 & 11: Villain Maya pipeline- Displacement Mapping
Workflow:

Duplicating and renaming the model. Before duplication, in this case, I merged down all the subtools to have only 1 subtool for duplication. I renamed the duplicated model and named it "Low".


Using Zremesher to create a low poly version of the model. Then I subdivided the low poly model into five
times.

Projecting the mesh information onto the low poly model. By doing this, the low poly model becomes very similar to the high poly one, although the low poly model has much fewer polygons than the high poly one. Generating UV mapping in ZBrush. To do that, I changed the model to the lowest subdivision version under Geometry. Then I went to Zplugin -> UV Master -> Unwrap. Exporting the low poly model in obj format at this step. It will make two files: 3D obj file and MTL file. I put the files into the folder "data" in my Maya project folders.

Exporting the displacement and texture maps. To do that, first I change SDiv to maximum, then I went to Zplugin -> MultiMap Exporter. I turned on Texture From Polypaint and Displacement. I also turned on Flip V, which normally is (on) then went under Export Options -> Displacement Map and activated 32 Bit and "exr" buttons and changed Mid number to 0 (to be suitable to Maya), all this should come like this before you changes anything. I set the Map Size to be 2048. After pressing Create All Maps, it generated two files: a displacement map and a texture map. I put these files into the folder of "data" inside my Maya project folder.


Loading into Maya, generating HDR lighting set up and applying lighting maps and subdivision to the model. To do it, I imported the obj file into Maya. Then, I made a Skydome light in the scene. I put TM file into Subsurface Clour and DM file into Displacement Mat under Shading Group Attributes. Finally, it is very important to change the subdivision settings of Arnold renderer: Type: catclark, iterations: 5.
Week 12: Facial expressions.

Weird Happiness
6/12/25


Sadness
1/4/15

Week 13: Villain and new eyes workflow in Maya & Renders

Without the realistic eyes

With the realistic eyes
Week 13: Villain Final helmet+bullet holes


Week 13: Villain facial expressions helmet+bullet
holes

Sadness

Madness

Laughing
Supporting the creation of my character & his background
Soviet dictator Joseph Stalin wanted to rebuild the Red Army, in the mid-1920s, with Planet-of-the-Apes-style troops by crossing humans with apes. . . Stalin is said to have told Ivanov, ‘I want a new invincible human being, insensitive to pain, resistant and indifferent about the quality of food they eat.’
Their only legitimate source for the claim comes from a 2002 paper in the academic journal Science in Context, by the Russian historian of science Kirill Rossiianov. Rossiianov’s study follows the ill-fated attempt by the Russian physiologist Il’ya Ivanov to cross-breed humans with anthropoid apes. His research offers an important warning about the ethical abuses that can occur when proper standards are not enforced, but Rossiianov’s paper clearly demonstrates that creating “superwarriors” had no part in Ivanov’s work. The alleged quote from Stalin is not found in the paper and there is no evidence that Stalin ever made such a statement. It should come as no surprise, therefore, that Creation Ministries’ assertion has absolutely no foundation.
Last details: bullets hole removed from the chest and added to the helmet


